|
|
|
|
|
|
|
|
|
Model and texts by the modeler
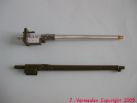
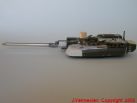
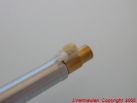
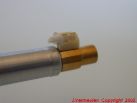
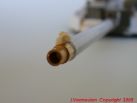
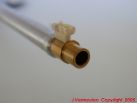
I couldn't help
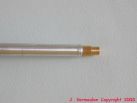
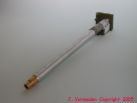
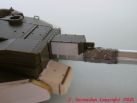
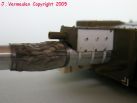
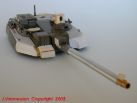
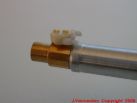
doing a new aluminum barrel, although Tamiya's is finely represented. The muzzle
has been done from brass which a material easier to work with).
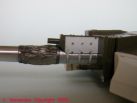
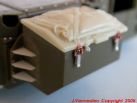
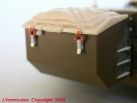
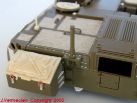
I partially re-built the box on the barrel (near the mantlet) with the help of
plastic card. The canvas cover has been made with lead foil from a bottle
collar. I shaped it prior to gluing it with CA cement.
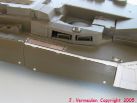
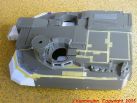
I re-built the two small panels on each side of the turret roof and added the
anti-slip coating in their center.
The both handles
located at the front of the turret roof get a reinforcing plate that is bolted.
The other handles on the roof haven't been modified that way.
|
|
|
|
|
|
|
|
|
|
|
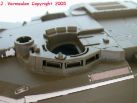
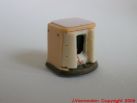
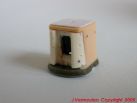
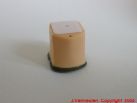
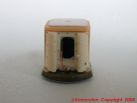
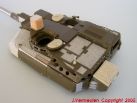
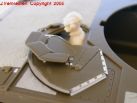
Another
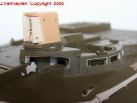
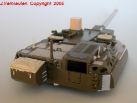
feature of the SXXI is the new TC sight which is technically improved. This
sight is developed from the one fitted to the UAE version.
To do that, I had to scratch build the sight housing which has a more square and
stocky shape. I used a block of resin I sculpted and scraped with a scalpel
blade.
To do the little window, I used an old microfiche I cut to the desired
dimensions. I added the wiper and the washer. The holes on the frame are drilled
with a 0.2mm drill.
I
enhanced the vision blocks by reshaping their edges with plastic card,
some bolts have been added.
Now, I'm done with the major modifications!
The course of the building should develop normally.
|
|
|

|
|
|
|
|
|
|
The saga continues with the ultimate detailing step. I solved
the lack of roughness of the anti-slip coating by applying on the model a mix of
sodium bicarbonate and Tamiya putty diluted with acetone. I prepared the
surfaces with some Tamiya masking tape.
The TC and gunner's hatches, the rear turret bin lid and the 3 figures are the
bonus provided by Blast-Models for the release in France of the Tamiya kit.
|
|

|

|
|
|
|
|
|
|
|
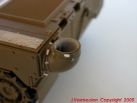
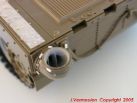
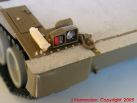
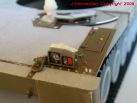
Here and there, I added some bolts. A few personal
improvements have been carried out on the muzzle reference system and the rear
bin fasteners.
From a little piece of resin I sculpted, I redid the MRS. In fact, it lacked
some details especially concerning the bolted plate. So, I added the missing
sockets as well as the bolts. The remaining parts of the MRS were made of
Evergreen rods and plastic card.
The rear bin has been improved by the addition of the fasteners springs made of 0.2mm copper wire coiled around a 0.3mm piece of copper wire I tightened with pliers, the spring of it helping the process.

|
|
|
|
|
|
|
|
|
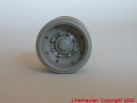
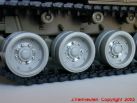
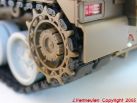
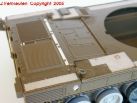
As a preamble to the hull and running gear assembly, I want to tell that major
differences exist concerning the roadwheels. The new outer faces are covered and
get 8 bolts around their periphery. In the center of the wheel, the 8 bolts are
not bolted to the hub anymore but directly to the wheel. So I had to redo each
wheel (12 in all!).
In this case, I drilled out the periphery with a 1mm drill and a homemade
template to guarantee an equal distance between each hole. This has proved
necessary to take into account the difficulties linked to the angled wheel face.
Then I set small bits of rod in the holes located at 0.5mm from the outer edge.
I added bolt heads made of hexagonal rod. Furthermore, I must tell that the
molded bolts on the wheel periphery have been removed with a lathe by cutting
the external part of the wheel.
I made the bolts from a purpose made mold: in a piece of brass, I drilled 1mm
holes, rather close one to each other, then with a hammer and a hexagonal
wrench, I stamped the holes to get a hollow hexagon.
Then you just need to soften a piece of plastic sprue with a candle and to stamp
it in the hollows to get a full series of similar bolts. Now, you just have to
sand the end to give the same height to the bolts and cut them away with a razor
blade.
The
new tracks of the SXXI are in metal like the ones fitting the M1A1 and A2 Abrams.
So, no trouble here, I used the AFV CLUB reference #AF35012 : these are
individual link tracks that need no glue or the assembly. Moreover, they
favorably replace the molded ones of the Tamiya kit. Three full hours are
necessary to get superb tracks which fit without any modification.
Concerning the anti-slip coating, as mentioned above, I used sodium bicarbonate
mixed with Tamiya putty diluted with acetone.
|
|
|
|
|
|

|
|
|
|
|
|
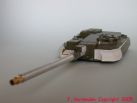
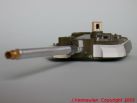
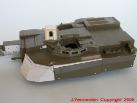
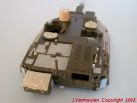
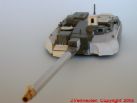
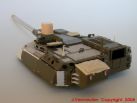
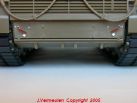
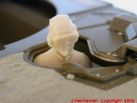
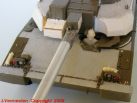
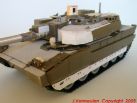
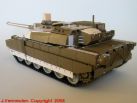
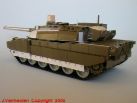
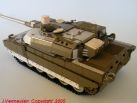
At this stage, I worked on the barrel again after having seen
on pictures that the joints between the thermal sleeve elements were not enough
marked. Concerning the holes on the underside of the barrel ... they have been
represented!
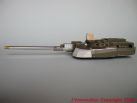
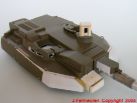
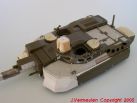
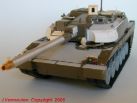
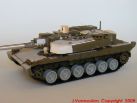
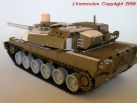
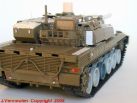
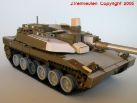
Following are some overall views of the "beast" in progress. In this case, I
temporarily assembled some elements (like the skirts) to give a general feeling
of what will be the French armed forces future tank.
As mentioned above, the figure comes from Blast-models.
|
|
|
|

|
|
|
|
|
|

|
|
|
|
|
|
| Page 1 | Page 3 |