ref : Tamiya #35279
conversion by Jacques Vermeulen
Model and texts by the modeler
Model and texts by the modeler
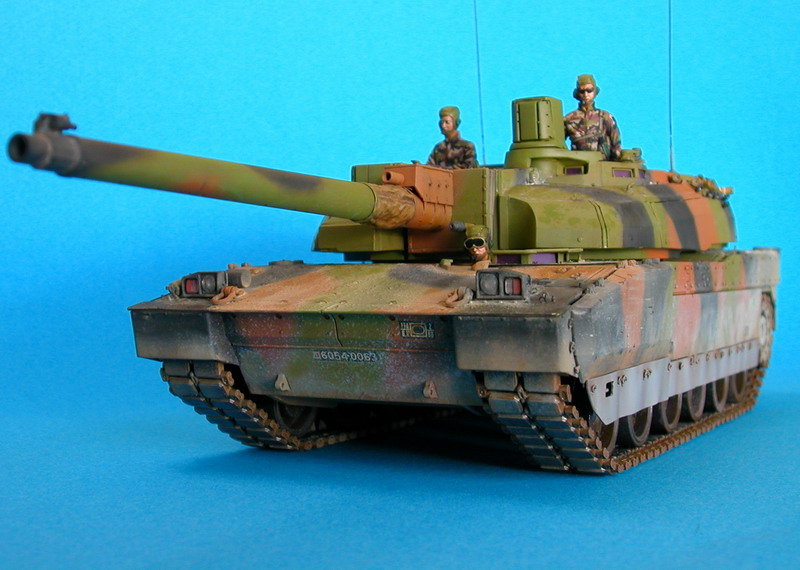
The Leclerc SXXI is the latest version of the French main battle tank. It has just begun to be fielded to the armor units. Jacques Vermeulen has used the Tamiya kit as a base to create a model fully original.
After a thorough study
of the sprues, we must admit that Tamiya has done a beautiful model faithful to
the real one. However it is still subject to some improvements.
The version I chose to represent being the S XXI, some
modifications will be necessary.
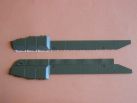
At first, I chose to redo the side skirts flaps. I personally find that they
look too linear at their bottom and the detail which annoys me more is the
rendition of the retaining pins of the flaps. Using 2/10mm thick copper wire, I
made 42 pins ! You just need to wind the wire around a drill of 1mm diameter and
fold the wire on itself (see pics) then add in the middle of the ring a piece of
stretched rod to represent the pin maintaining the axis.
The flaps have been made with 5/10mm thick plastic card and shaped with the help
of a candle flame !
On that same occasion, I reproduced the steps at the bottom of the front armor
plates.
|

|
|

|

|

|

|
According to the data and remarks Rodolphe Uguen-Laithier
kindly passed me on about the various improvements made to the newer S XXI
versions, I had to modify among other details :
The increased thickness of the turret front armor as well as the change in the
profile of the boxes (addition of about 5cm of armor).
I started to remove both the bins on the left and right turret sides then I
firstly added the "body" extension (1,5
mm) on the front edge of the turret with plastic card. Afterwards, I made the
new armor casings.
On the left side panel, I replaced the upper strip which profile is altered and
I made a little notch in the plastic of the kit where the aforesaid strip is set
(it is not directly in contact with the the hull).

|

|

|

|

|

|

|

|

|
I undertook to make the MG gas evacuation flap ... and here is
what it looks like!
Of course, it is not yet perfect, some touching up is still necessary.

|

|

|

|
And now follows in pictures the building of the right side casing with plastic card. The front armor block is made from a resin bit coming from a kit sprue!

|

|

|

|

|

|

|

|

|

|

|
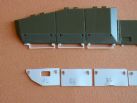
After having modified the bins and the turret front armor block, I ended by assembling and fitting those elements. I made the little flap at the front end of the right bin with a piece of PE fret.
The turret bustle outer sides and the side bins undersides
get a reinforcing plate with little bolts. The step under the rear bins is not
enough represented and needs the gluing of a 1mm thick piece of plastic card.
Some missing rivets and bolts are added here and there.
The position of the handles at the back of the bustle is fixed (this is a false
interpretation by Tamiya). The handle base is redone with some putty after the
removal of the plastic roll.

|

|

|

|

|

|

|

|

|
|
| Page 2 | Page 3 |