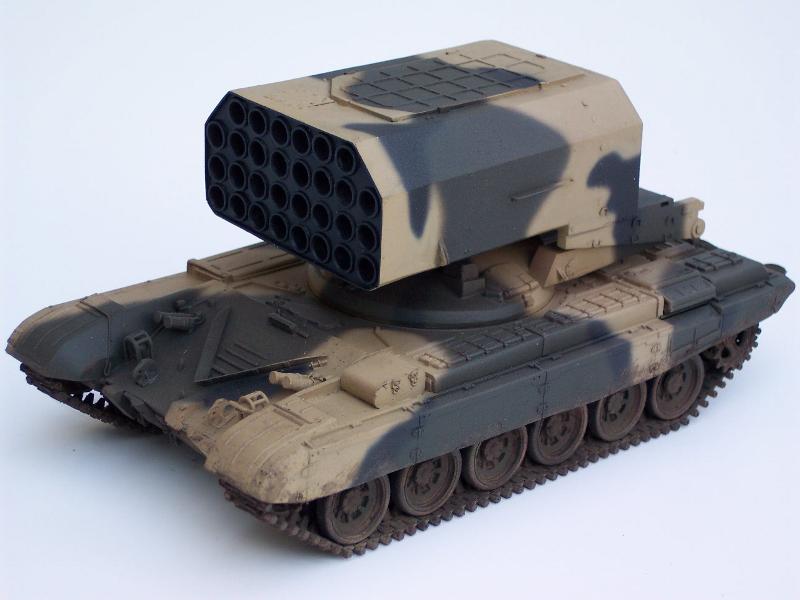
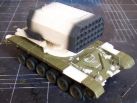
TOS-1
Buratino
Ref
: SP Designs#119
Zvezda #3550
Friul #A-11
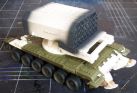
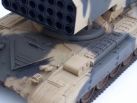
The TOS-1 is a multiple rocket launcher based on a T-72 chassis. It appears in the early 80's. It has been designed to fire rockets fitted with a thermobaric warhead that has effects similar to those of a flame-thrower.
Initially
tested in Afghanistan where two vehicles were deployed, it has
also been used in Chechnya.
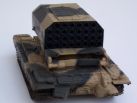
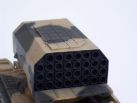
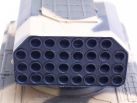
The launcher pod has 30 tubes of 220mm. It is able to fire from
400 to 3500m.
It has a crew of three.
The
kit is produced by SP Designs and depicts an early vehicle. This
conversion is designed for the T-72 by Dragon or Zvezda which
have got the same moulds. Tamiya kit may be used but needs the
sanding of the add-on armor plate on the glacis and the
modification of the turret hole to fit the conversion one.
The kit comprises approximately 30 soft pale yellow resin parts.
The instructions come as 2 A4 sheets with hand drawings, B&W
pictures, a camo scheme and a conversion table for various paint
brands.
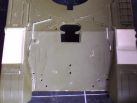
The
build begins with the donor kit preparation. The right front tank
and the left front bin are cut away following the instructions.
On the front plate, the various wires are removed except those
for the headlights. The towing cable support tabs are redone with
thin plastic card as well as the securing system. The reinforcing
triangular plates of the front fenders are removed. The two
little oval plates on the right of the driver hatch are sanded
away and new ones done from plastic card. They are located at the
right place closer to the electric wire.
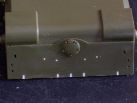
Under the glacis, the locating holes for the 4 bolted plates are
filled. On the rear deck, a little oval plate is moved to the
left. All the locating holes are filled.
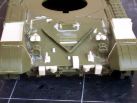
Then
starts the building of the hull front part. The replacing parts
on the sponsons are fitted and the seams sanded. On the right
sponson, the fuel pipe is done with plastic rod, it joins the one
running on the inner side of the tanks.
The fenders springs are added from copper wire. The smoke
dischargers are fitted and their wiring done withcopper wire too.
The driver hatch is detailed and its vision port redone as it is
different from the basic T-72 one. It has a curved protection
which is flipped down when firing.
Under the glacis, the parts #16 (inverted J shaped) are modified
then set in place. Being too short, they must be lengthened by 3mm
to be in contact with the entrenching tool.
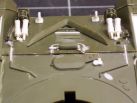
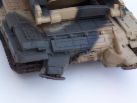
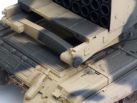
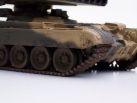
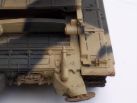
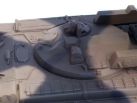
The
rear part requires much more work. In fact, the stabilizers issued
by SP are wrong. You need to have good pics to modify them. To
make it simple, they should be angled so as they face outward and
not in the axis of the vehicle. Bolts are added on the 3 sides of
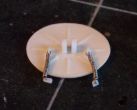
the upper part.
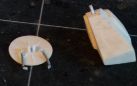
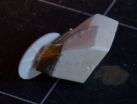
The round pads are thinned and their fastening system totally
redone. A rubber protection made of lead foil is added. The small
springs are done from electric wire coiled around a needle. The
part #26 (maybe a jack ?) is not glued on the right stabilizer
but on the engine deck.
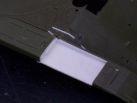
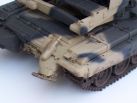
The securing system for the tow cable is redone with plastic card
as well as two small protection plates for the taillights.
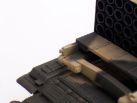
The spare track links come from the Friul set, their fasteners
are done with plastic card and rod. The kits ones are too large
to be used.
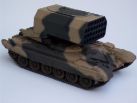
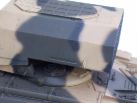
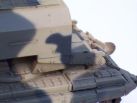
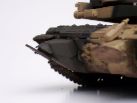
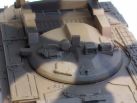
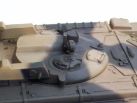
The
turret builds without any trouble. I just replaced one lifting
hook badly cast. The TC hatch handle is added from metal wire.
The searchlight bracket is done with PE fret instead of the
plastic strip provided by SP.
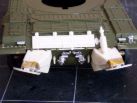
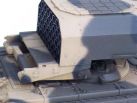
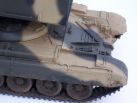
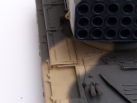
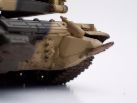
The launcher pod requires more work. The supporting arms are
detailed. All the bolts are replaced with plastic rod bits, most
of the kit ones are ill cast. On the right arm, 8 bolts are added
to the trunnion. Inside the arms, at the rear, the 2 small
squared parts are thinned. On each arm, 2 triangular plates are
added between which a small rod is added too. On the top of each
arm, a notch (1.5mm high x 2.5mm large) is done, then it must be
covered by a very thin plastic card strip.
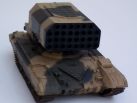
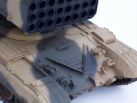
The pod comes in 3 parts, a large box and its two ends. the fit
is a real pain and requires filling and sanding to get the
feeling of one single part. The tubes are drilled out then a
plastic plate fills their backsides. This gives them some depth.
It is also possible to drill them more widely to settle 30 tubes.
But sure, the fit troubles will turn this into a tricky solution.
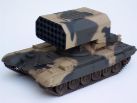
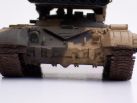
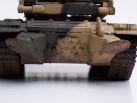
The chassis is built with the wheels moveable. The tracks are replaced by Friul ones. The side skirts are fitted easily. 3 series of 2 holes are drilled out in the front sections as well as 4 holes in each square plate of the fenders. The rubber protections of the tanks and bins are not used as shown on most of the pics available.
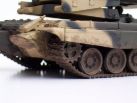
The decoration is the 3-tone one: Olive Green XF62, Sand mix of XF57 and XF60 and Black XF1. The scheme varies from a tank to another. I used the pics shown in the concord book dedicated to the T-72. SP provide a 5 view-scheme.
This conversion enables, with a little work, to get a vehicle which is out of the ordinary.
I would like to thank Pierre Delattre for his valuable help through his pictures.
 |
 |
 |
 |
 |
 |
 |
 |
 |
 |
 |
 |
 |
||
 |
 |
 |
 |
 |
 |
 |
 |
 |
 |
 |
 |
 |
 |
 |
 |
 |
 |
 |
 |
 |
 |
 |
 |
 |
 |
 |
 |
 |
 |
 |
||||