Ref: Trumpeter #09523 Soviet 2K11A TEL w/9M8M Missile Krug-a (SA-4 Ganef)
Ref: Trumpeter #09523 Soviet 2K11A TEL w/9M8M Missile Krug-a (SA-4 Ganef)
The 2K11 Krug-A is a long range air-defense system operating at medium to high altitudes which was developed in the 1960s and entered service in the Soviet army in 1967.
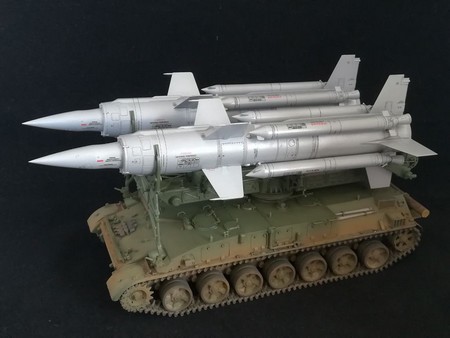
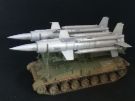
The vehicle based on the GM-123 carries two missiles on a 360° pivoting support which an be elevated to 70°. The 9M8M missile is an evolution of the 9M8 missile used by the Soviets in Vietnam. Measuring nearly 9 m long with a 86 cm diameter, the missile is made of a main body accommodating a 150 kg explosive warhead and four boosters used for the launching. The missile which flies at mach 4 can be fired in a range from 9 to 50 km and at an altitude from 250 m to 23.5 km with a kill probability of 0.7 at 18 km.
The launcher is part of a battery including 3 launchers, 1 guidance radar 2S32, 1 missile supply vehicle 2T6. The long range detection is done by the 1S12 (P-40) in the command battery of the battalion. The detection in height is done by the PRV-9 radar at the regiment level.
The 2K11 was briefly used by the Soviets in Afghanistan in 1980 and was quickly withdrawn. The 2K11 was also in service with all the armies of the Warsaw Pact. It remains in service in Norht Korea and some former Soviet republics.
The kit
At the opening of the box one is struck by the size of the missile body molded as a single part. This gives an idea of how large the finished model is. The box is full of 21 light grey plastic sprues, 1 clear part sprue, 30 sprues for the track links, 2 hull halves, 2 missile bodies, 1 photoetched parts sheet, 1 very large decals sheet, 1 instructions booklet and 2 color plates for the decorations and the decals application on the missiles.
The cast is perfect with a high level of detail. The molding lines are thin and the ejection pin marks well located. The tracks are of the clickable type and so they are workable. The PE parts are thin. However the tools straps do not have bending line which makes the shaping difficult. To conclude, the clear parts are really clear and fit without any issue.
The instructions booklet comprises 24 pages and splits the build into 45 steps. It sometimes suffers from a bit of imprecision as explained later. The proposed decorations give the choice between a Russian vehicle without any marking, a Czech one as preserved in a museum and an East-German one. All of them are painted plain green.
The build
The hull
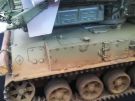
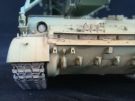
It starts with the lower hull and the addition of the fenders which require some sanding to fit. The nthe suspension parts zre glued as well as the idlers. The roadwheels and the sprockets are assembled but not glued to the hull yet.
At step 7 Trumpeter asks to assemble the tracks and put them in place. I assembled them and put them aside. The instructions call for 117 links per track but 115 are enough to get a correct tension.
At that time I assembled the both hull halves. Trumpeter asks to glue all the details to the upper hull from step 9 and then only to assemble the hull halves which I dislike.
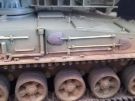
At step 8 you need to glue 6 parts E2 on both fenders. On the right side one you need a seventh just behind the lock K3 for the front fender.
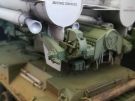
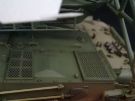
At step 9 the accessories are added to the upper hull. The tools straps require some attention. The plastic part A16 needs to be sanded to allow the handles to go through. The PE part needs to be bent without folding line. It is advised to make a jig as you have 10 of them to bend.
At step 10 part D27 is in fact C27. To fix the axe D64 there should be 2 holes on the hull side, only 1 is present. This still allows to put the part at the right place.
At step 11 it is not necessary to glue the windows GP3 to the episcopes as a protection will later cover them.
At step 12 you need to bend PE part PE-A1 which is a the very rear of the hull roof. As I didn't manage to bend it, I replaced it with a styrene length.
At step 14 Trumpeter did two mistakes. First one hook D32 is missing on the left side of the glacis. Only one part is provided in the kit whereas you can easily see two hooks on the instructions. Then the little box D27 on the left side is located the wrong way. You need to cut off the half-moon part at the back and place it with the hinge at the front.
At step 15 you have to glue one convoy light K13 on each side of the hull.
At step 18 Trumpeter has omitted the strap PE-A11 on the right side headlight cover.
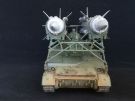
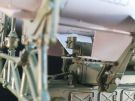
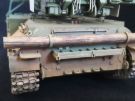
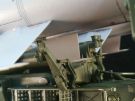
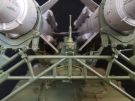
The launching support
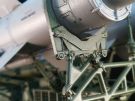
Steps 19 to 23 deal with the large frame at the front. The build comes with no issue. However cleaning the main part is tedious. At step 21 the hinges K38, K44 and K45 are not glued to keep the frame mobile which is useful when installing the missiles at the end.
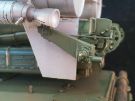
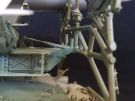
Steps 24 to 41 deal
with the support. It can stay mobile in direction and elevation. However to do
so you need to use some flexible material to replace the cables at steps 40 and
41.
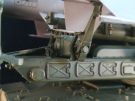
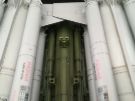
Steps 28 and 29 give the option to build a box rearward of the missiles with
shutters open or closed. Without any explanation by Trumpeter I opted for the
closed version.
At step 30 on part C17 you have to glue one part E15 to each side. To glue parts E7, you need to put the corner without the bolthead at the lower right corner.
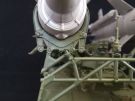
At step 35 it is advised to use a missile body to check the alignment of the three fixation rods of sub-assemblies LL, MM and QQ. You will have to do the same with parts D22 and D24 at step 39.
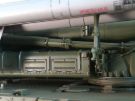
The missiles
The build comes with no issue. I didn't glue the round plate K30 at the rear of the missiles to handle them more easily. It is advised not to glue the boosters to apply the decals when time comes.
The missiles are glued onto the launching support after the sub-assemblies are painted. Because of the small size of the contact points, I use CA glue to secure the missiles. The build is finished by the installation of the round plates at the rear of the each missile.
The decoration
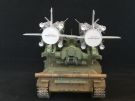
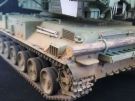
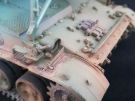
I chose the Russian decoration with no marking on the vehicle. The base paint is Tamiya XF-67 NATO green. I made some highlights with the base color mixed with some XF-15 Flesh. The details are enhanced with a brush in the base green and more XF-15. Then I sprayed a coat of Klir before starting the weathering. The latter began with an ochre filter on the upper parts of the vehicle to avoid the monotony of the base color. A dark brown pinwash has been applied around the details and in the recesses.
To create a dusty look, I first sprayed some well diluted XF-52 Flat Earth mainly on the lower hull and less on the hull upper parts. Pigments AK Dark Earth were diluted with Tamiya acrylic thinner and applied with a brush over the running gear and the fenders. When dry, I applied some very diluted mat varnish over which I sprinkled Dark Earth pigments again to create some thin dried earth deposits.
To paint the missiles I began with the painting of the aluminum parts with some Tamiya XF-16 Flat aluminum. AFter the parts were masked I painted the missiles with a mix of Prince August Light Ghost Grey and Tamiya X-11 Chrome Silver. A coat of Klir is sprayed before the application of the 200 decals. Then the boosters are glued after the contact points are cleaned. A pinwash composed of Tamiya grey Panel Line Accent Color and dark brown is applied in the recesses. On the aluminum parts the pinwash is darkened with a bit of Mars Black.
Click on a thumbnail to see the full sized picture
|

|
|
|

|

|

|
|

|
|

|

|
|
|
|
|

|

|

|

|

|
|

|
|

|

|

|

|

|

|
|

|

|

|
|

|

|
|
|
|
|
|

|

|
|
|

|

|

|

|

|

|

|

|

|

|
|
|||
04/2020