ref: Tamiya #35257 T-55A
Blast Models #35019K Conversion IDF Tiran 5 - SLA Tiran
Modelkasten #SK-59 T-55 tank (working tracks)
Eureka XXL #ER-3506 Towing cables for modern Soviet tanks (T-54, T-55)
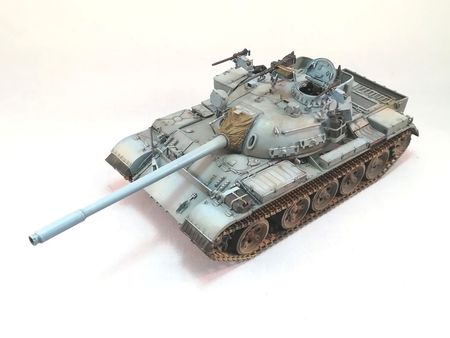
The Tiran 5 has been developed by Israel from captured Egyptian and Syrian T-55s. The major modifications included large stowage box and bins, many jerrycan holders, a stretcher bracket on the glacis, new front mudguards, new headlights, a infantry telephone and new US radio sets. Moreover the armament was improved with the addition of 1 .30 cal MG at each crew member hatch and 1 .50 cal MG on the gun mantlet. The original 100mm gun was replaced with a British 105 mm L7 gun. On the left side of the turret a 60 mm mortar was fitted.
The Tiran was first used by Israel in 1968 and then regularly saw action until 1982 during Operation Peace for Galilee.
The Tiran 5 entered service with the South Lebanon Army, a Christian militia supported by Israel, in the early 90s. At this time, it replaced the ageing Tiran 4 and M50 Sherman already procured to SLA by Israel.
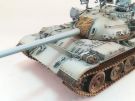
The Tiran 5 in SLA service was modified. The main gun was the original Soviet 100 mm again and the .50 cal MG was moved from the mantlet to the center of the turret roof. On some tanks, the rear large stowage box was removed.
When the Israelis withdrew from South Lebanon in May 2000, they were followed by most of the SLA members and their families. A number of Tiran remained to cover the withdrawal before being destroyed by the Israeli air force. Those which were not destroyed ended in the hands of Hezbollah and Amal militias before being in turn handed over to the Lebanese army.
The kit
The T-55 kit by Tamiya is not the best of the market but has long been the only one available. It is a mix of Russian made and Czech made T-55. However most of the features needed to turn it into a Tiran comes in the Blast Models conversion. I also decided to use a set of Modelkasten workable tracks.
The conversion includes nearly 100 resin parts and allows to build a Israeli Tiran 5, a SLA Tiran 5 or a look-alike Tiran 4 (based on T-54). The instructions are in the form of a set of A4 pages with black and white pictures of the assembled model. Very few explanations are given concerning the Tamiya parts to remove or modify. You need to carefully pay attention to the pictures to guess where you have to glue some parts especially on the turret.
The quality is usually good with Blast Models items. However my sample was a bit poor with many torn mold lines. So some extra preparation work was needed. All the MG barrels were bent which was not a big deal.
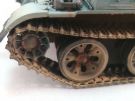
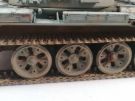
The tracks set is excellent in my opinion. The links are marked A or B without any explanation. They all look the same to me. However I assembled a run of As and another with the Bs. The plastic pins are handed. The longest one with a kind of rib goes inside the track. To help insert the pins in the links Modelkasten provides a very useful jig.
The build
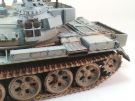
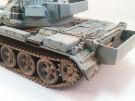
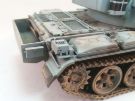
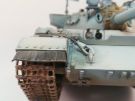
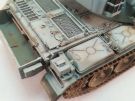
I started with the suspension and quickly shifted to the parts which needed some modifications. Cutting the front mudguard is quite easy but you need to be careful not to erase the fender spring. You also need to remove the driver vision blocks covers, fill the slot for the rear fuel drum brackets and the headlights protection positioning holes.
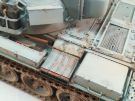
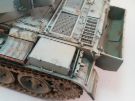
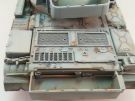
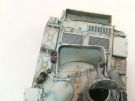
Then I added the resin parts according to the instructions. For the engine grilles I used some leftovers from a Eduard set dedicated to the Tamiya kit. Fortunately I still had the Czech parts in my set. I had to trim a bit the engine fan flap so it fits with the engine deck.
I found the assembly of the infantry phone quite tricky. Fortunately I used a comprehensive walkaround on the SVSM site (see references below) which help understand how the phone was fitted.
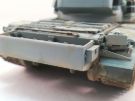
I didn't intend
to overdetail this vehicle however I couldn't omit the fuel tanks lines. They
were made of brass wire while the connectors were sections of phone wire sleeve. I also added the front fender locks with some styrene strips and thin
wire. While there are many types I decided to go with the one seen on the Latrun
Tiran 5.
Finally I modified the resin headlights protection by removing the front
cover as most of the Lebanese Tiran 5 did not have the cover fitted. I added the
electric wire conduit from the headlights to the hull top.
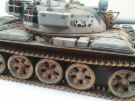
To end the hull assembly, I fixed the Tamiya roadwheels well-known issue that is the grooves on the tires sides. I simply sanded the sides till they were flat. I also used a sharp blade to create some damage to the rubber.
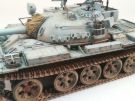
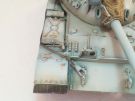
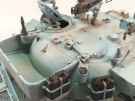
The turret needed much more attention. You first have to decide which version you want to represent, Israeli or Lebanese. No issue for me as from the beginning I wanted a SLA Tiran. However if you choose the Israeli version, you will have to source a 60 mm mortar tube as only the brackets are provided by Blast Models.
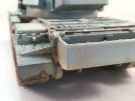
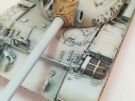
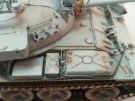
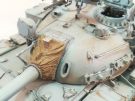
At step 2, Blast Models directs you to first glue the large basket. Then you can glue the various parts all around the turret. However in my sample I first needed to made legs for all the jerrycan holders and most of the boxes. Be careful when you place the parts as the instructions are a bit vague. I cut away the tab at the back of the resin antenna bases as they would not align with the notches in the turret.
I let apart the Uzi holders and the fire extinguisher on the rear basket.
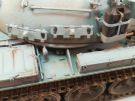
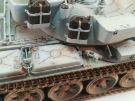
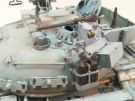
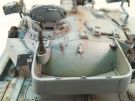
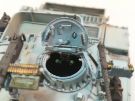
I glue the gunner hatch closed and concentrated on the TC hatch which is very detailed even if Blast Models has omitted the inner handle. I found the arm supporting the MG would prevent the hatch to freely move. Maybe it was me gluing it the wrong way.
I didn't use the small light at the base of the IR spotlight. Instead I drilled out the hole where the axis goes through.
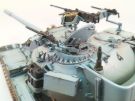
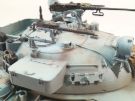
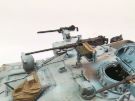
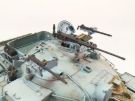
When building the SLA version you go to step 4. There you assemble the specific .50 ca MG. Be cautious as the pedestal is quite fragile. Blast Models asks you don't use the hull rear basket which is not totally right according to period pictures.
The decoration
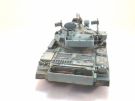
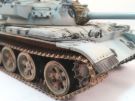
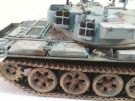
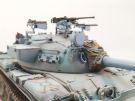
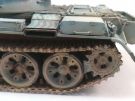
It is the SLA blue-grey which decided me to build this Tiran. So I had to make a mix to duplicate this color. I started from XF-18 Medium Blue which I mixed with XF-20 Medium Grey. I sprayed this over the running gear and the lower parts of the hull only. Then I mixed some XF-18 and XF-2 Flat White (2 parts/1 part) to get the overall color. I added some white to the mix to create some highlights. When done I sealed the base with some Klir.
To start the weathering I sprayed various references of pigments mixed with Tamiya thinner X-20A. This way the pigments do not need any fixer. Then I used some black, burnt umber and burnt sienna oil dots to create an operational look without turning the tank into a wreck.
Conclusion
This was an interesting and original project starting from two old references. Today the modeler has some better references to start with and no longer needs a conversion. The really fun part of this build was the SLA bleu-grey camo and I enjoyed it a lot.
References:
Tiran in Lebanese Wars by Samer Kassis, AMMO of Mig Jimenez editions
SVSM Latrun museum walkaround: an Israeli Tiran 5 walkaround but really
useful.
Click on a thumbnail to see the full sized picture
|
|
|
|
|
|
|
|
|
|
|
|
|
|
|
|
|
|
|
|
|
|
|
|
|
|
|
|
|
|
|
|
|
|
|
|
|
|
||
04/2019