Ref : AZI35046 AMX10RC Daguet
Model, texts and photos by Didier Lecru

Introduction:
I want to warmly thank Azimut Productions for having released in
the early 90s the AMX10 RC without which I would never have been able to
complete this project. By the way I also thank Sampiero, Jospeh for his friends,
for the valuable help he provided. So I had this kit since 1993 and built it in
the Gulf War version. Being tired by seeing it while newer versions entered
service, I decided to give a go to a scratchbuild project. To lead this
conversion to an end, I studied several websites as well as many magazines
dealing with the Afghanistan conflict.
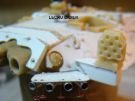
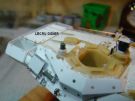
I – The hull:
The Azimut hull did not get major modifications. The waterjets must be
deleted. The front armor panels have been copied from the photoetched ones
provided in the kit and made from plastic card. The side armor panels were
created from scratch as well as the driver hatch armor. Several parts like the
pioneer tools, the cables and the front and rear lights are totally redone. The
GPS antenna on the rear is not omitted. The antislip coating is applied to the
front glacis. After several tries, I opted for a mix of bicarbonate, putty and
acetone.
II
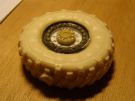
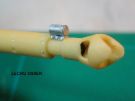
– The wheels:
These are Michelin XML tires issued by Blast
Models and adapted to the Azimut rims. The result is convincing!! Thank you
for that Sampiero.
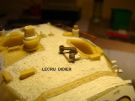
III – The turret:
The turret structure itself was not modified. The side armor panels are
quite tricky due to the numerous angles. The turret top received the same
antislip coating. With the minimum amount of reference found in the press, I had
to used my eyeball Mk1 to create the turret bustle basket as well as the bin
containing the IED jammers. At the front of the turret, the two platforms
carrying the IED jammers antennas have been added. On both sides of the gun
mantlet Galix smoke dischargers are fitted. On the turret top, I fitted a AANF1
MG coming from the Tamiya Leclerc kit. The bags in the side baskets are bits of
polystyrene covered with aluminum foil and painted green
IV – The figures:
They are in fact Academy Israeli tankers with the specific helmet.
V
– The painting:
The scheme is the three tone one given by Azimut in the instructions. The
references used are from the Tamiya range. The green got some drops of yellow.
The brown was treated the same way. But the black was used directly from the
bottle.
VI – The weathering:
At first, a coat of matt varnish is sprayed over the model. Then, the green
is brushed with some Humbrol #150. Another drybrush is applied with the same
Humbrol #150 enlightened with some yellow. The same method was used for the
brown with some Humbrol #186. The black is brushed with some Humbrol #34 white.
Then, a wash of turpentine and burnt sienna is applied over all the model to
enhance the recesses.
Be careful not to be heavy handed.
In order to get a camouflage worn by the Afghan sun, a diluted white filter is
applied over the model. The dust effect is made with sand pastel powder applied
to the appropriate areas with a brush. Finally, a last coat of varnish is
sprayed to fix the pastel.
Conclusion:
Without Azimut
Productions, this model would never have seen the light. The documentation
on this vehicle is necessary as you cannot "invent" some parts. This kit is hard
to build and remains fragile. Prior to beginning the assembly, I had to make
wooden handles on which were fixed the turret and the hull. This way, the
manipulations were troubleless.
A last advise: if you intend to start this kit, be patient!

|

|

|

|

|

|

|

|

|

|

|

|

|

|

|

|

|

|

|
|

|

|

|

|

|

|

|

|

|

|

|

|

|

|

|

|

|

|

|

|

|

|

|

|

|

|

|

|

|

|

|

|

|

|
|

|

|

|

|

|

|

|

|
|

|

|

|

|

|
|

|

|

|

|

|

|

|
|

|

|
|

|

|

|

|

|

|

|

|

|

|

|

|

|

|

|

|

|

|

|

|

|

|

|

|

|

|

|

|

|

|

|

|

|

|

|

|

|

|

|