Ref: Tiger Model #4602 AMX-10RCR Tank Destroyer
Blast Models #BL35238K AMX 10 RCR Update set TM
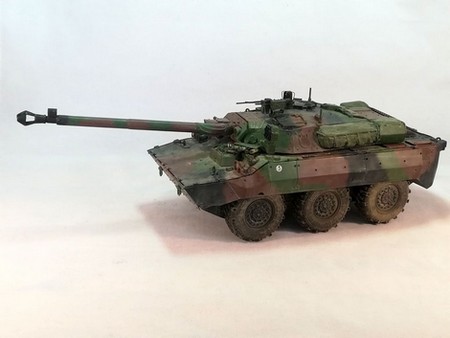
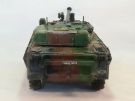
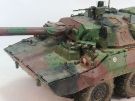
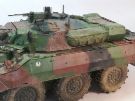
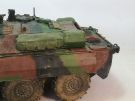
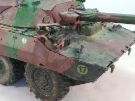
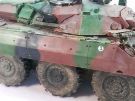
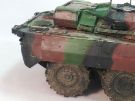
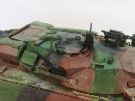
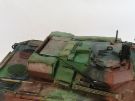
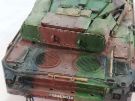
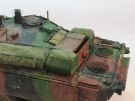
The AMX 10 RCR is the upgraded version of the reconnaissance vehicle entered in service with the French army in 1982. The upgrade program started just after the first Gulf War. It concerned the whole vehicle. The hull is better protected, the gear box is improved as well as the suspension. The amphibious capacity has been deleted. On the turret a large bustle bin has been added, an infrared jammer (LIRE) has been fitted, Galix grenade launchers have replaced the original launchers, the protection has been improved too and a battle management system has been integrated.
The AMX 10 RCR is a rapid and well armed vehicle with a 105 mm gun capable of firing APDSFS rounds up to 2500 m by daylight or at night thanks to its thermal camera. Its secondary armament consists in a coaxial 7.62 mm AA-NF1 MG and another one on the turret top. The 8 Galix launchers can be loaded with smoke rounds or fragmentation grenades. The AMX 10 RCR is protected against NBC agents.
The crew includes a driver in the center, a vehicle commander, a gunner and a radio-operator-loader.
The AMX 10 RCR is in service in the armored regiments of the light armored and light brigades. It has seen action in all the theaters of operation where the French have deployed including Afghanistan and Mali.
Approximately 250 AMX 10 RCR have been delivered and they will remain in service until their replacement by the Jaguar. The AMX 10 RC has been exported to Morocco and Qatar.
The kit
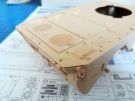
Issued in 2014 by Tiger Model, it was the first plastic model of the AMX 10 RC in the upgraded version. The box includes 5 light beige plastic sprues, 1 clear parts sprue, 2 hull halves, 2 turret halves, 6 vinyl tires, 6 polycaps, 1 photoetched parts sheet, 1 decals sheet, 1 length of thread, 1 instructions booklet and 1 color plate for the decorations.
The carving is nice and the level of detail satisfctory. Some parts attachments to the sprue are ill designed and make the cleaning of the part complicated. The carving of the tires is very good and the mold line is easy to remove. The PE sheet includes few parts. Only the panoramic sight protection is hard to shape. The instructions are clear and are not complicated. However the order of assembly of the add-on armor plates is missing. The fit of the hull and the turret lets to be desired. Some putty is mandatory.
Tiger Model allows to present the hatches in the open or closed positions. However to depict the vehicle with the lowered suspension you will have to modify some parts. Likewise the exhaust is represent with the cover shut which requires more work to represent it open.
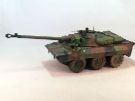
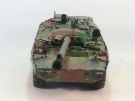
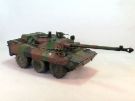
Two 3-tone camo decorations are proposed. They both concern a vehicle of one of each armored regiments of the 6th light armored brigade.
The upgrade set by Blast Models is designed to replace the turret hatches, the gun mantlet dust cover, the IR jammer, the fire extinguishers, the NBC decontamination bottle, the antennas supports, the AA-NF1 ammo box, the fabric bags on the turret roof, the Galix laucnhers and an unidentified part. To be honest the Galix are the only parts that give a plus with the IR jammer which comes with no molding line.
The build
Tiger Model planned 16 steps. The assembly starts with the preparation of the wheels and the suspension arms. Part C6 on the inner face of the suspension arm is completely invisible. So you do not need to use it.
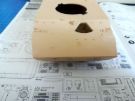
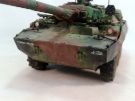
The assembly of the hull is done as soon as step 2 after having deleted some details according to the instructions. Then you need to fill the various gaps at the front and the rear of the hull.
At step 3 I glued the exhaust cover B19 to part B9 as stated. Then I sawed the upper part to represent the cover open. You also need to hollow the exhaust. At the both rear angles you need to fill the gaps.
Until step 6 I nearly stuck to the instructions. I paint black the back of the driver episcopes before gluing them. I did not glue the headlights glasses.
At step 6 I replaced the thread by some metal cable to make the tow cable. This one is secured with CA glue because the brackets on the hull are hardly present.
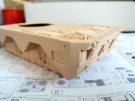
At step 7 I applied some black to the lower hull and the wheels before installing them. In fact at step 8 the side armor panels are glued and what is behind becomes unreachable. It is advised to glue the armor panels from the rear to the front.
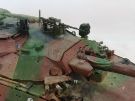
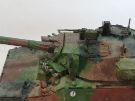
At step 10 I cut the dust cover of the gun to replace it by the resin part. The fit is excellent. You need to clean the seam between the both parts of the gun as well as on the muzzle brake.
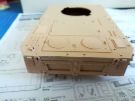
At step 11 the turret shell is assembled. There again you need some putty to fill the gaps. Fortunately most of them are hidden under the add-on armor panels.
At step 12 you need to bend the panoramic visor protection. Tiger Model gives a flat jig which allows to bend two of the four legs at a time. So you need to do it again trying not to damage the first ones. A 3D jig would have been more useful and not too difficult to design.
At step 14 the AA-NF1 MG presents some mold lines requiring a thorough cleaning. Again the back face of the episcopes is painted black. The Galix launchers are replaced by the resin ones. The tubes being loaded you need to add the securing cable of the caps. A thin electric wire is used to make the cables.
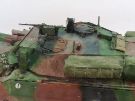
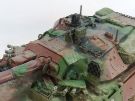
At step 15 the large bustle bin is assembled without problem. To glue it to the turret it is advised to first fit the turret to the hull to prevent the bottom of the bin from scraping the engine deck.
The decoration
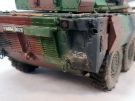
Before starting to paint, you need to make the antislip coat on the hull and the turret using reference pictures (see the section Walkarounds). The antislip coat is done with Mr Surfacer 500 applied with a brush and tapped with a flat brush to create the coarse look.
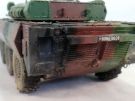
The camo is done according to the instructions scheme. The shades are as follows: XF-1 Flat Black, a green mix of XF-5 Flat Green and X-24 Park Green and a brown mix of XF-10 Flat Brown, XF-52 Flat Earth and XF-3 Flat Yellow. A coat of gloss varnish is applied before applying the decals. Another coat seals the decals before the weathering.
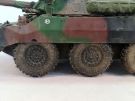
For the weathering I applied some oil dots on the whole vehicle to fade the base colors. Then I made different mixes of oil paint and pigments very diluted which were applied around the details to create a dust effect. I enhanced this effect with pure pigments which I fixed with white spirit.
Click on a thumbnail to see the full sized picture
|
|
|
|
|
|
|
|
|
|
|
|
|
|
|
|
|
|
|
|
|
|
|
|

|
|
|
|||
06/2020