ref: Revell #03092 SPz Marder 1A5
PSM #35075 Marder 1A5 upgrade kit

The Marder 1A5 is the last variant of
the well-known German infantry fighting vehicle. It entered service with the
Bundeswehr in 2002 and integrated a number of improvements compared to the
previous version. The protection against the mine threat got the main effort of
the development team. Thus the various modifications included a mine-protection
belly armor, a false steel floor, a blast protected fuel tank, new hung seats
with footrests and seatbelts. The interior stowage was modified and nothing
remained stored on the floor anymore. New side skirts were included as well.
Consequently the weight was increased by 4 tons which needed a new suspension
and brake system. Wider tracks were also fielded.
Compared to the Marder 1A3, the armament remained unchanged. The main gun is a 20 mm MK 20 DM 6 A1. The coaxial MG is a 7.62 mm MG3. The vehicle commander also can fire MILAN ATGMs from firing post mounted outside his hatch. In addition, the Marder 1A5 has a bank of 6 smoke-grenade launchers.
The vehicle troop compartment can accommodate up to 6 fully equipped Panzergrenadiers.
The Marder 1A5 has been first deployed to Kosovo and from 2006 to Afghanistan. During the mission in Afghanistan in the vicinity of Kunduz the vehicles got a 2-tone camo made of Helloliv or Sandbraun over a Sandbeige base. Later during the operation, the Marder 1A5s got a Barracuda Mobile Camouflage System with in-built Heat Reduction. A final variant known as Marder 1A5A1 has been fitted with an external air-conditioner.
Within the Bundeswehr mechanised battalions the Marder is being replaced by the Puma.
The kits
The base kit is the Revell Marder 1A5 kit which is basically the Marder 1A3 kit with a new lower hull, a new sprue providing the A5 specific parts and new vinyl tracks. The cast is good with few flash and passable mold lines. The detail is a bit soft in some areas. All the hatches are solid molded and this is where the PSM set is an excellent addition. Revell provides you with a decals sheet, the usual length of steel wire and an instructions booklet.
The PSM upgrade set includes the hatches as separate parts, a completely new turret, replacement parts for a number of plastic parts, a length of twisted brass wire and a sheet of photoetched parts including nearly 100 parts. The instructions come as 3 A4 sheets with black and white or color pictures of the parts assembled. Some instructions are given in both German and English languages. Unfortunately the instructions are a bit vague in many areas and never tell you which plastic kit parts should be omitted or modified. So it is most advised to thoroughly study the both sets of instructions before starting the build.
The build
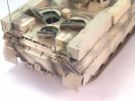
I started with the lower hull and the running gear. However I did not fix the roadwheels at this stage. Then I prepared the upper hull by opening the hatches and removing some details like the vision blocks. A lot of attention must be paid there as PSM does not give you any indication. When this was done I glued the resin parts inside the upper hull. Beware not to glue part #40 before having glued the grilles at the back of part #19 which is the rear vision blocks part. Nothing in the instructions mentions this. As I intended to build the troop compartment hatches open I added a large rectangle of plastic card to the lower hull in order to hide the empty interior.
As this stage I assembled the both hull halves. I assembled and glued as much resin parts and PE parts as I could before gluing the plastic parts. The biggest issue is the lack of bending lines on most of the PE parts. So you have to dry fit a large amount of parts. The only instructions given by PSM is "biegen" which means bend. Some pictures have been taken so close to the model that it is hard to guess which part of the vehicle it represents. So you really need to take care of the PSM instructions and have a good set of reference pictures.
Fortunately the resin parts are well
cast and perfectly fit the plastic kit. The only issue I had was with the rear
ramp which needed some trimming. Unlike the resin parts the PE ones are a bit
more complicated to deal with. First of all they are not numbered and are
represented in the instructions by a simple drawing of the part on the
frame. Moreover as I wrote above they do not have bending lines and PSM does not
provide any bending template.
For the headlight guards, you have to keep the feet of the plastic parts. The
inner face of the guard has no mark to glue at the right height the headlight
support.
The spare track link brackets have a PE hinged part to lock the link. Without
bending lines it is hard to bend them the right way.
Above the exhaust there are 4 tiny PE parts to add. The picture in the
instructions does not help at all. It is better you find a reference picture to
understand how to bend and glue the parts.
The last parts I had some trouble with were those under the large handrails on
the upper hull protection (Revell parts #5 and #6). The instructions are not
clear as where you have to glue them. The reference pictures show they are right
under the handrails. I advised you glue the other handrails #14 and #15 before
gluing the PE parts.
As usual I did not add the clear parts to hull at this time. I prefer adding them after the paint is applied.
The turret assembly was pretty straightforward compared to the hull assembly. You have to keep some plastic parts and even if PSM does not give you the numbers the parts are quite obvious to guess. PSM gives the option to show the MG3 box open which I did not do. I did not us the MILAN firing post as well. Few period pictures show the post fitted in Afghanistan.
To give my Marder a more operational look I decided to add tarps, crates and protection cages at the rear of the vehicle. All theses details are visible in the Tankograd book GECON -ISAF which was my basic reference during this build. The crates are made of plastic card, the tarps are made of putty and the cages are made of putty, mesh and tissue to depict the covers. The towing cables were attached to the front towing hooks as most of the reference pictures show it. Likewise the rear mirror have not been fitted and the support folded on the hull.
The decoration
I chose the Helloliv and Sandbeige camouflage. I used the Vallejo set dedicated to the Bundeswehr. I am not a great fan of these paints as they tend to clog in my airbrush but I like their satin look and they save me some time to find a correct mix in my Tamiya usual colors.
Revell gives you the camo pattern but omitted the top view. Fortunately I keep all the former kits instructions booklets and the Marder 1A3 has the missing view. Before painting the entire camouflage I started with the running gear and gave it a basic weathering. Once done I glued the side skirts and sprayed the Sandbeige base and then added the Helloliv stripes. I'm used to paint freehand but one can use some masking putty.
When the camouflage was applied I sprayed a coat of Klir to seal it and apply the decals. In fact I only used the black and white crosses. Unfortunately the color in my set were offset so I needed to get others from my spare box.
The weathering started with a dark brown pinwash. Then I applied some mud to the lower parts of the vehicle and I finished with a generous amount of dust. Some scratches were added to the side skirts. I did not want to overdo the weathering as the reference pictures show well maintained vehicles.
Conclusion
The Revell kit is a good base and the combination with the PSM kit allows to build a very nice kit despite the poor instructions of the latter. This point does not make it a kit for beginners. The PSM kit I used is no longer available. But most of the parts are present in other sets dedicated either to the Marder 1A3 or the Marder 1A5. You also can find resin tracks and different markings for Marders in Afghanistan.
Reference
Panzermodell.de
Click on a thumbnail to see the full sized picture

|

|

|

|

|

|

|

|

|

|

|

|
|

|

|

|

|

|

|

|

|

|

|

|

|

|

|

|

|

|

|

|

|

|

|

|
||||
03/2019