ref: Takom # 2122 Bergepanzer 2
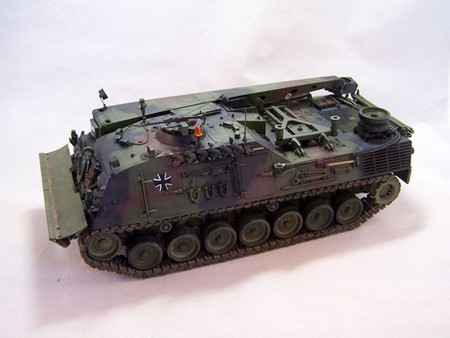
The Bergepanzer 2 is a recovery vehicle based on the Leopard tank with which it shares 75% of components. Designed from 1962, the first production vehicle was issued in 1966 after the trials phase.
The Bergepanzer 2 is fitted with a main winch at the front which can pull 34.5 tons or 69 tons when using the pulley stowed on the front glacis. A crane is mounted to the right side of the casemate. It can be traversed to 270 degrees and raised up to 72 degrees thanks to two hydraulic cylinders. The winch and the crane have safety devices against overload.
The front blade is hydraulically operated and is used to anchor the vehicle when winching and as a support to lift loads from 13 to 20 tons.
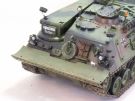
The vehicle carries a lot of tools and accessories among which a cutting torch, a chain saw, a jack, a pump to empty or fill fuel tanks and a cradle with a lifting tackle to carry a spare Leopard powerpack.
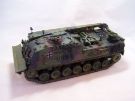
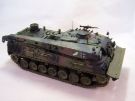
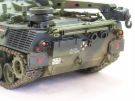
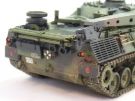
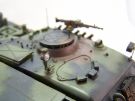
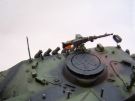
The Bergepanzer 2 is also equipped with 2x7.62 mm MG3. The first one is bow-mounted and the second one is mounted on a ring on the commander cupola. The vehicle has 6 smoke-dischargers, a fire warning and extinguisher system and a NBC system.
The crew is of 4 with a commander, a driver, one mechanic beside the driver and another mechanic at the back of the casemate.
444 Bergepanzer 2 have been built. 104 were used as a base for the engineer vehicle Dachs. The Bergepanzer 2 has been exported to Australia, Belgium, Denmark, Greece, Italy, the Netherlands and Norway. With the introduction of the Gepard and its heavier turret than the tank one a new and more powerful version, Bergepanzer 2A2, was adopted.
The kit
Takom have released the model in 2019. The box includes 9 light grey plastic sprues with 3 for the tracks, 2 hull halves, 1 sprue for clear parts, 6 sprues of vinyl end connectors, 1 small sheet of photoetched parts, 1 sheet of decals, 1 length of nylon thread, 1 length of twisted wire, and 1 instructions booklet.
The cast is really neat and the level of detail is excellent. Unfortunately the tools latches are molded solid. The suspension is fixed but the tracks can be workable. The crane and the blade can move. However when assembling the crane you have to choose between the travel or the working modes. The decals allow the depict 3 German 3 tone camouflaged vehicles, 2 German Olive vehicles and 1 Chilean vehicle.
The cleaning of the parts requires a minimal amount of work. Some parts require a bit of attention like the track links. The instructions are clear but some remarks will come later on.
The painting instructions are easy to follow but lack the scheme for the inner face of the crane. The paint references are only given in the Ammo Mig range.
The build
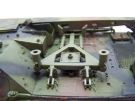
It comprises 29 steps and starts with the running gear and the suspension. I advise to simultaneously assemble the parts in step 2 and 3 as it is simpler to glue the shock absorbers covers and the wheels arms together. The covers A33 have a molded on arrow which must be removed.
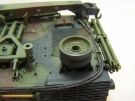
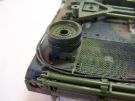
At step 4 the roadwheels and the idlers are assembled but not glued yet as well as the sprockets.
At step 5 you have to assemble the winch. However this is not mandatory.
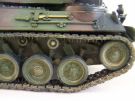
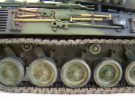
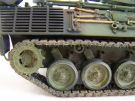
Step 6 is dedicated to the tracks assembly. After the preparation of the 83 track links, you have to assemble without glue the 4 parts per link without any jig. The vinyl end connectors really secure the links and allow the track to be moveable. The connectors have a outer face you need to notice. The tracks are installed to check the right length and are removed to be painted separately.
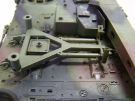
At step 7 the anchor blade is assembled and glued to the thrust arms. Be careful while you glue the arms to align them properly.
Before gluing the details to the rear plate at steps 8 and 9 I first glued the episcopes inside the upper hull and then I glued it to the lower hull.
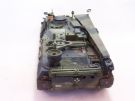
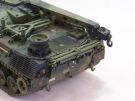
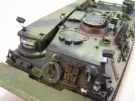
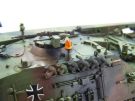
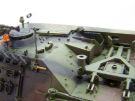
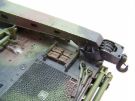
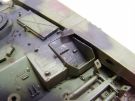
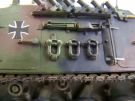
From step 10 you have to glue the tools and the accessories to the hull sides. There are a lot of parts to glue and you pay attention to the notice. Dry fit tests are useful as some tools overlap others.
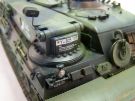
At step 11 part G6 has a lip which must be at the bottom. I didn't use the parts inside the access hatches.
At step 13 I didn't glue the rearview mirror to avoid any breakage. The rod is replaced by some metal wire.
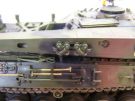
At step 14 you have to glue the episcopes and the bow MG which I did before gluing the hull halves.
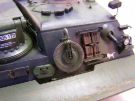
At step 16 I didn't glue the flashing light. Takom tell to glue the handle of the winch hatch in the open position only. You need to put it the other way if the hatch is closed.
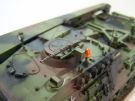
At step 18 you have to glue two latches E3. I advise to glue the bin E47 at step 19 first. The legs of the ring mount H29 for the MG3 must be thinned to properly fit.
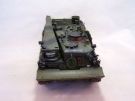
At step 21 the cradle for the spare engine has molding lines to be cleaned. It is not necessary to glue the cradle as it snaps onto the brackets E13 and E14 which are glued to the engine deck. This allows to paint the 3 tone camouflage more easily and to paint the cradle green.
At step 23 you have to install the 2 tow cables. I prefered to glue the brackets first which is only dealt with in step 24.
At step 25 the tow bars are not glued and at step 26 the sub-assemblies H6/H7 are not glued so they remain mobile. This allows to paint the bars separately.
At step 28 even if I chose to depict the crane in the transport position I kept the parts moveable. Only the hook must be glued in the transport position. To facilitate the installation of the cable of the crane, it is advised not to glue part F28 on the hook first.
Step 29 asks to glue the crane onto the hull. I preferred to paint the crane separately before gluing it.
The decoration
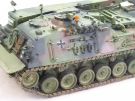
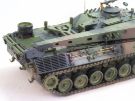
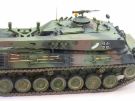
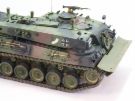
I chose the German 3 tone camo for the Panzergrenadierbataillon 401. To do so I used the Vallejo set dedicated to the Bundeswehr. I first sprayed a coat of green then I applied the brown patches. The black is the Tamiya XF-69 NATO Black.
Then I made the faded paint effect by applying with a brush some well diluted oils (light grey over the black, light brown over the brown and the green). Some edges have been rubbed with graphite powder to give them a metal shine. On the blade lower edge some paint chipping is done with XF-4 light green and XF-56 metallic grey applied with a bit of foam. Some brown simulates the rust. The blade stays green as it is used as an anchor unlike the blade of the engineer vehicles. The metal parts of the spare track links are painted with XF-84 then different rust shades are applied with a brush.
The running gear gets various sand and earth shades layers to give it a dusty look. To finish the weathering, grease and dirt spots are added mainly on the engine deck.
Conclusion
This model is pleasant to assemble. The build of the tracks is tedious but the result is very convincing. One can hope that Takom will release the Bergepanzer 2A2 variant which will allow to depict the vehicle in Afghanistan under the Canadian flag for instance.
Click on a thumbnail to see the full sized picture
|
|
|
|
|
|

|
|
|
|
|
|
|
|
|
|
|
|
|
|
|
|
|
|
|

|

|
|
|
|
|
|
|
|
|
|
||||
07/2020