Ref : Tamiya #35157
Dragon #3020

The M60A1 was
the main production model from 1963 to 1980. Other than the new roomier turret
design with a new mount for the M68 105mm main gun, little was done to the basic
M60 chassis excepting minor changes in hull fittings.
In 1974/75 the RISE (reliability improvement of selected equipment) program
featured a new engine configuration to help changing the engine. In 1977 the
M60A1 was again upgraded with passive IR sights for the driver, gunner and
commander and then designated M60A1 RISE/PASSIVE. Later smoke dischargers were
added on either side of the turret.
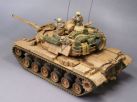
The crew consists of four members whom three operate the turret, with the gunner on the right, the commander directly behind him, and the loader on the left.
Pending the
fielding of the M1 Abrams, the USMC decided not to upgrade their M60A1 to A3
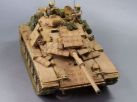
standard but instead added an explosive reactive armor package.
During Operation Desert Shield/Desert Storm the 1st Marine Expeditionary Force
fielded 210 M60A1’s with ERA.
Tamiya kit depicts this late M60 version. It comes in the usual white cardboard box with the sprues wrapped in separate plastic bags. There are 7 sprues with only one designed for the ERA version and others shared with the M60A3 kit previously released by Tamiya. In addition, come a lower hull, vinyl tracks (from the Sergeant York kit), a piece of nylon mesh, a decal sheet for two tanks, 2 metal shafts for the idlers and sprockets and a 10-page instruction booklet.
The level of
detail is good even if you can add many details to get a fully accurate model
(for example, the sprocket mud relief holes, the turret hatches inner faces …).
The parts are molded in a sand plastic with few injection marks and seam lines
(but there, it depends on the sprue).
The instructions are clear according to Tamiya fashion. They divide the
construction into 15 steps with 4 dedicated for the chassis assembly and 4 more
for the ERA blocks assembly.
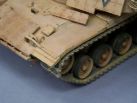
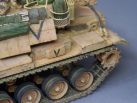
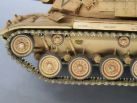
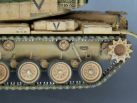
The build is out of the box and starts with the lower hull assembly. The only tricky step is the fitting of the superior parts that hold the return rollers. The fit is not perfect on the rear. You will have to fill some holes and gaps designed for the motorization. In the usual Tamiya way, the wheels are held in place thanks to plastic caps. They are set apart until the painting stage. A basic driver station is provided with a moveable hatch. But I decided to represent it buttoned up.
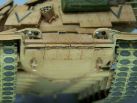
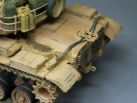
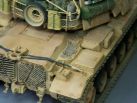
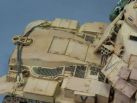
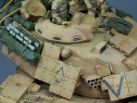
The upper hull requires little effort as few parts are glued onto it. Due to the ERA blocks, the smoke grenades boxes are moved from the turret sides to the air cleaners’ sides. So you’ll have to drill out two holes according to the instructions. Before gluing both hull halves don’t forget to drill out the locating holes for the hull ERA tiles. The ERA blocks are really easy to build and perfectly fit. You can also fill the empty driver vision port with some plastic card to represent the glass.
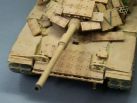
The next step
is the assembly of the turret. First of all, you need to drill the numerous
locating holes for the ERA blocks then only you can glue the both halves.
It’s time to fill the empty sight with a bit of plastic to represent the glass.
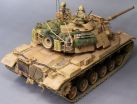
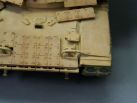
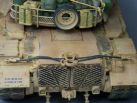
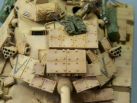
The turret basket assembly is quite tricky. First, you need to cut two parts in
the mesh piece provided by Tamiya. The instructions give a scale 1/1 template.
To help getting the rails horizontal, Tamiya provide us with a jig. The final
assembly needs to be handled carefully. Once done, you can glue the mesh in
place. Using some thin glue, I soaked the bottom mesh part in order to stiffen
it when dried. Then only I glue it to the basket bottom. Concerning the vertical
part, I glue one end first and progressively unfold the rest of the mesh. Like
the bottom part, the vertical one is finally stiffened with thin liquid glue.
With a sharp pair of scissors I trim the excess of mesh.
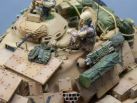
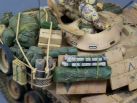
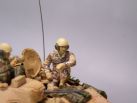
As an option, you can install a fording snorkel. Tamiya also give two crew members and some crew gear pieces.
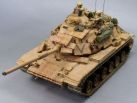
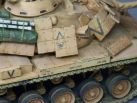
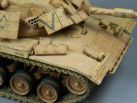
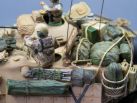
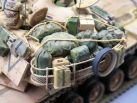
The base coat
is a mix of buff and white. A coat of gloss varnish is sprayed over the model
before applying the decals which are sealed with another coat of varnish. Some
filters of various shades (raw umber and burnt sierra) are used to start the
weathering. Some white oil dots are also applied to give a variation effect to
the camouflage. Then a wash with burnt sierra is used. A final coat of mat
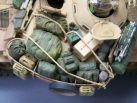
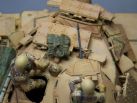
varnish is sprayed and then after the crew gear is set in place. The various
elements come from the kit itself, Tamiya modern US equipment set, Plus Model
and Verlinden.
The markings depict the tank of the CO
of Charlie
Company, 3rd Tank Battalion.
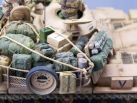
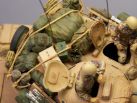
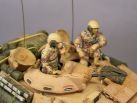
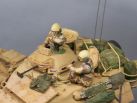
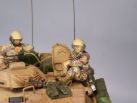
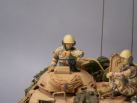
The crew
members come from the Dragon US tankers set. The loader is built nearly out of
the box while the TC has got a new left arm and new hands. His neck has been
modified so as he looks at his watch.
The BDUs are painted in the 90’s Desert camouflage with Tamiya acrylics paints.
The faces and hands are painted with oil paints. They got a wash of burnt sierra
to enhance the details.
This kit builds into a nice rendition of this specific version of the famous M60 MBT. It is an easy kit, except maybe the turret basket, that can be recommended to any modeler.
Reference http://www.patton-mania.com/index.html
|
|
|
|
|
|
|
|

|
|
|
|
|
|

|

|
|
|
|
|
|
|
|
|
|
|
|
|
|

|
|
|
|
|

|
|
|
|||