Ref : Academy # 13415 M1151 Enhanced Armament Carrier
Def Model # DM35009 M1151 Natural weighted suspension + MT/R tire set
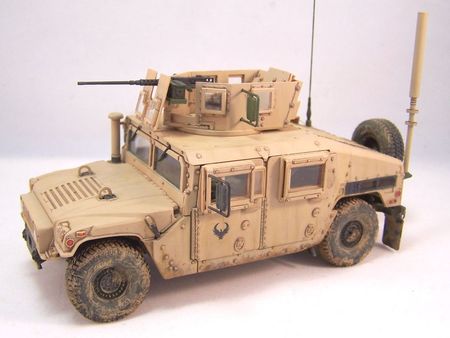
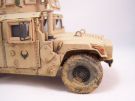
The M1151 Enhanced Armament Carrier entered service in 2005 to replace the M1025. It has a reinforced chassis, a more powerful engine and a better protection. The latter consists of a first armor package which is factory installed and a second one which is added according the field conditions.
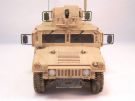
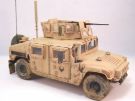
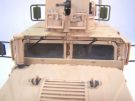
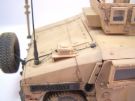
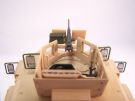
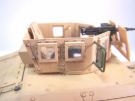
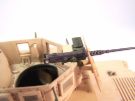
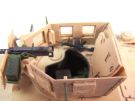
The M1151 is an armament carrier fitted with an armored ring mount which gives the gunner a 360° protection. In some cases, an overhead protection can be added. The mount can receive various weapons like a Mk19 grenade-launcher, a M2 0.50 MG, a 7.62 mm M240 MG and a 5.56 mm M249 MG.
The M1151 can carry 4 soldiers. It has been deployed in Afghanistan and in Iraq. It is in service with the US Army and the Marine Corps as well as with various foreign armies.
The kit
Released by Academy in 2011 it is still the only one in plastic at this scale. It comprises 6 beige sprues, 1 clear plastic sprue, 10 black plastic tire halves, 1 photoetched parts sheet, 1 set of polycaps ans 1 sheet of decals. The carving is fine and the cast is excellent with few molding lines to clean. However some links with the sprues are a bit thick.
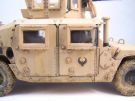
The vehicle can be built with the doors and the rear hatch open. Two figures and some accessories for the interior are included. The photoetched parts are very thin.
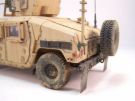
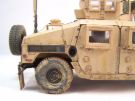
Accuracy wise this M1151 has a major issue with the ground clearance. The vehicle sits too high nd the way the suspension is designed does not allow to fix this easily.
The instructions come in a 8 page booklet complemented by a folded A3 sheet displaying the last 2 steps and the decoration. The drawings are clear and Academy gives the color references to paint the interior.
The suspension correction set is a Def Model reference. It comprises resin and white metal parts. In addition to the suspension Def Model provides 4 weighted wheels and the spare wheel. The cast is excellent. I won't say the same concerning the instructions. Def Model gives photos of the parts glued which is not enough. No indication about the kit parts to replace is given. The shafts to the wheels have to be cut but Def Model does not give the length to remove. Moreover some parts are misnumbered when compared to the instructions. So you need to be very careful and should study the plastic parts to be replaced.
The build
It begins by the chassis and consequently by fixing the suspension. As stated above you need to cut the shafts to the wheels and replace them by the resin ones. Some care is needed as there are three types of different length. Then you have to replace parts C26 and C27 which are the suspension arms and the liaison parts in-between. While the suspension arms are easy to identify, the liaison parts are all numbered #5 whereas they are different. So you need to study the plastic parts. Once this step is complete the rest of the assembly is easy even if some resin parts are very thin. However I advise to drill out the white metal parts to facilitate the future setting of the wheels.
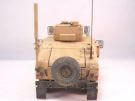
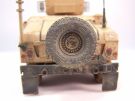
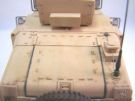
The assembly of the chassis continues until step 8. I thinned the rear mudflaps and installed the resin wheels. Step 9 asks you to glue the radiator grill and the spare wheel support. I didn't glue those parts to facilitate the painting and the handling. The whole chassis is painted black.
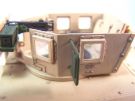
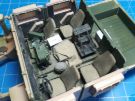
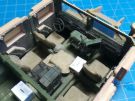
From step 10 your start the assembly of the interior. I assembled most of the parts according to the instructions but I let apart the dashboard, the seats and the windscreen glasses so I can paint the interior in sub-assemblies. At step 11 I added some details to the radio sets like the wiring and a additional microphone. The doors are assembled separately as well and painted before being glued.
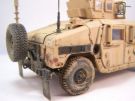
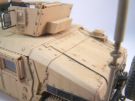
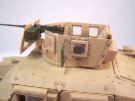
The weapon station is built according to the chronology of the instructions. The inner face of the shield is thinned. The MG and the shield are not glued yet to allow easy painting and weathering. Once the weapon station is complete it is secured from inside to the roof with part B10. The the roof can be glued to the hull.
I now have two sub-assemblies: the chassis and the hull. They will be assemlbed only after they are painted.
The decoration
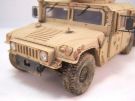
Academy proposes three decorations: two in tan color and one in the NATO three-tone camo. I chose the decoration with the eagle painted on the doors.
The chassis is painted black and the hull is painted tan with the reference AK122 OIF US vehicles base color. A coat of Klir is sprayed before applying the decals. They are very fragile and I totally damaged the eagle of the shield.
The weathering is done by applying
various brown washes in the recesses. I used the oil dots methods to create
streaking. I also applied an ochre filter on some areas to break the monotony of
the base color.
The chassis got a coat of mud made with the reference Light Mud of the brand
Pre-size. To harmonize the whole vehicle I used some Gulf War Sand pigments by
MIG.
Click on a thumbnail to see the full sized picture

|
|
|
|
|

|

|
|
|
|
|
|
|

|
|
|
|
|

|
|
|
|
|
|
|

|
|
|
||
07/2019