ref : Best Value Models #35060
In 1974 the Canadian Armed Forces issued a
requirement for an Armoured Vehicle General Purpose (AVGP). Production was completed in 1982 by which
time 491 had been built in three versions (Grizzly, Cougar and Husky).
The AVGP series is fully amphibious, being propelled by two propellers
mounted at the rear of the vehicles, behind the third road wheel on each side. The AVGP has a
maximum speed of 100 km/h on roads and 10 km/h in water.
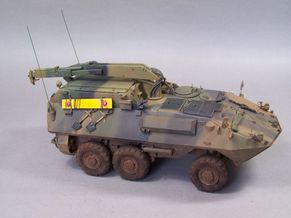
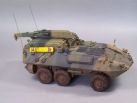
The Husky has entered in service with the Canadian Forces as the recovery vehicle of the AVGP family in 1976. It has a crane capacity of 4.5 tons and winch capacity of 8 tons. It had a crew of two, a driver and a technician. A total of 27 vehicles were built.
What you get
The Best Value Models (BVM) kit comes as usual in a donor kit with resin and photo-etched parts. For the Husky, the donor kit is the Revell LAV-25 with the sprue for the crane parts from the Trumpeter LAV-R.
BVM provide the resin parts and a photo-etched sheet also valid for the other AVGP products in their range and some metallic wire for the hydraulic hoses. The kit represents an initial model, although some pieces are more suitable for a late model. So before beginning the kit, it is advisable to collect good photos of all the vehicle areas.
Preparation of the kit
It begins by cutting the 8x8 LAV chassis to get a 6x6 one. For the upper hull, this is no problem. For the lower body, we must carefully study the instructions. Once the hull is cut, the central part is set in place and the upper hull is in turn glued. At this point we have to remove all unnecessary details (positioning marks for the parts, engine front grill, winch cable bracket, hinges of the winch access hatch, driver's hatch, exhaust brackets, housing of the head of the second shock absorber). Then the driver's hole is filled and the upper edge of the engine hatch is engraved the right way. The glasses of the driver's vision blocks are also removed. On the back, we must fill the positioning holes for the handles above the doors and for the tail light guards.
Building
To facilitate the handling of the kit, the casemate is installed. This one was slightly warped, it had to get reshaped in hot water. Then, once in place, we must fill the gap on each side with thin strips of plastic.
The building of the chassis is not difficult.
But for the front axle, the
suspension arms
must be cut from the
Revell
part and then
bonded to the resin part.
For a good alignment, it is preferable to first place in the
shock absorber "columns".
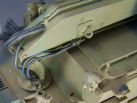
Then, the hydraulic jacks are added.
BVM has made an error in reproducing
on the two jacks
the tubes facing down.
In reality, the jacks are simply reversed and thus the tubes are too.
The flexible hoses made
from fuse wire
are added.
The water propulsion units are not mounted at this stage but we can already fill the positioning holes for the rudders.
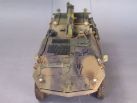
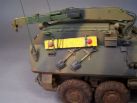
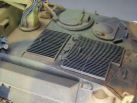
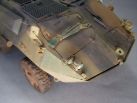
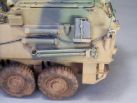
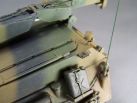
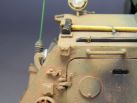
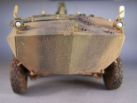
The front compartment is labor intensive and specially detail wise. The hinges of the winch hatch are replaced by the resin ones. The wire cutter is set up. As the instructions are not precise enough, it will be useful to refer to its documentation. The new resin engine grill is set in place. On the engine access hatch a tarp is also set in place. The plastic locking handles are thinned and then glued. A brass handle is added to the center of the edge.
The head lights are improved with the wiring of the cat's eyes. The side lights have a U-shaped flattened metal protection. BVM provide photo-etched ones but their oblique legs must be cut as they do not correspond to the initial model.
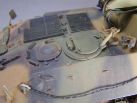
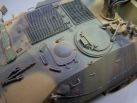
The driver's hatch of the AVGP is reversed compared to the LAV family one. BVM provide a resin hatch with a good shape but the hinges are not correct. They are cut away and redone from plastic card. We also can add the device for locking the hatch in the open position like for the vehicle commander (VC) hatch. To do this we use strips of plastic, plastic rod of 0.5 mm diameter and brass wire. On the VC cupola, the MG support is shortened otherwise it is blocked by the smoke launchers.
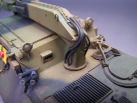
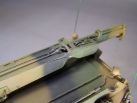
The
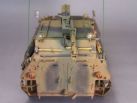
casemate also requires some extra work as BVM has simplified many details.
The large doors are molded with a piece of rod on the top to be removed. It
will be replaced by a piece of plastic rod glued on 6 vertical supports made
from plastic card.
On the sides there are four stops for the doors.
Those provided by BVM are false.
They are modified and detailed with the locking system.
The doors are sanded to fit the opening on the roof of the casemate.
Between the two hinges, a piece of plastic rod, 1 mm in diameter, is added.
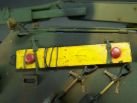
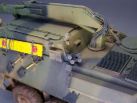
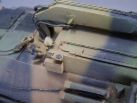
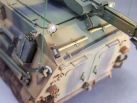
At the front and rear of the casemate, there are two mobile work lights.
BVM provide only two lights from the needed four. The both missing must be done.
The headlights of the LAV are cut from their support.
The four lights are thinned and detailed.
The cradles are made from plastic strip.
The resin lights cradles are removed and replaced because they do not have the
right shape.
The wiring of the lights is also added.
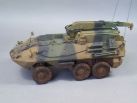
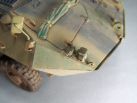
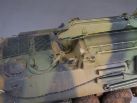
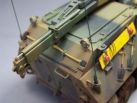
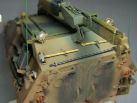
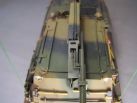
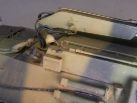
The crane comes from the Trumpeter LAV-R and corresponds to the initial model. It needs to be improved by adding all the hoses and hydraulic lines. For this, brass rod and fuse wire will be used. The connections are based on resin bolts.
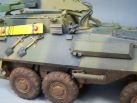
On the sides of the vehicle, the different lifting rings and handles are set in
place
with the help of pictures because most of them do not have the same position as
on the LAV. Some
tie-downs made from copper are also added.
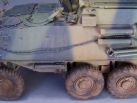
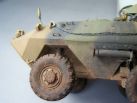
On the right side, the exhaust is shortened at the front by 4mm.
The bolted piece to the front is also removed.
The supports for the two shovels are added.
On the left side the supports for the towing triangle made from brass are added.
A jerrycan holder is made of thin plastic card.
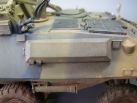
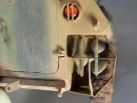
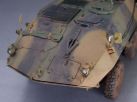
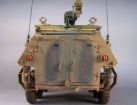
Concerning the back, the doors
must be modified.
BVM suggest filling the vision ports and drilling new ones but it is easier to make
new doors.
The taillights are redone in plastic card.
BVM use LAV taillights which is not correct for an early Husky.
The protection is a round piece of aluminum tubing provided by BVM. It
is thinned inside.
The locking systems for the doors are made of plastic card as well as the socket on the left.
On the back of the bunker, you must remove the tools fasteners and do new ones
in the
right places.
The housing of the crowbar is thinned from the inside.
The bar is made from resin left-overs because there was none in my kit.
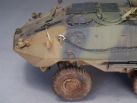
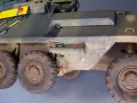
Finally, we must put in place the wheels and the marine propulsion system.
BVM provide photo-etched protections for it.
To install them, we must move the whole propulsion system forward for about 1mm.
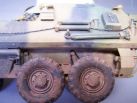
The wheels are from the LAV-R kit.
The tires are rubber and the rims are more detailed than in the kit wheels.
To adjust the
Trumpeter
wheels to the
Revell
chassis we need to enlarge the holes
and add a
2mm thick
washer for two wheels.
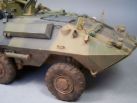
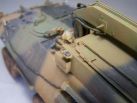
Painting
The AVGP initially had a three-tone camouflage of green , khaki and black.
The pattern varied from one vehicle to another.
The
Armoured Acorn site provides a theoretical scheme as well as references for the Federal
Standard colors.
After seeking advice, I used XF65 Field Grey for the green, XF69 NATO Black for
the black
and a mixture of XF49 Khaki and XF62 Olive Drab for the khaki.
Conclusion
This kit is a good basis to represent a Husky.
Unfortunately, BVM have made too many mistakes for it to be mounted directly out
of the box.
The instructions are too approximate for the location of many resin parts even for some plastic
ones.
Too many parts are false or incorrect for the early version.
Finally, with a very good documentation and a lot of work, it provides a unique
model but not suitable for beginners.
A big thanks to Steve Hearn, Jason Bobrowich Jim Carswell for their invaluable
assistance in the document research and theirs comments during this assembly.
References :
Modern Canadian
Vehicle Discussion Group
Prime Portal
Armoured Acorn
|
|
|
|
|

|
|
|
|
|
|
|
|
|
|
|
|
|
|
|
|
|
|
|
|
|

|
|
|
|
|
|
|
|

|
|
|
|
|
|
|
||||