Ref: Bronco # CB-35094 Type 63-2 (YW-531B) Armored Personnel Carrier
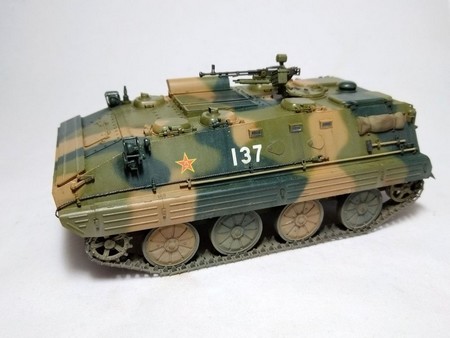
The Type 63 or YW-531 is Chinese made armored personnel carrier which entered service in the 1960s. A first improved version, the YW-531A, was introduced in 1968. It featured an upgraded engine and a new suspension. In 1981 the YW-531B version was adopted by the Popular Liberation Army. The denomination Type 63-2 used by Bronco is not confirmed in the available documentation.
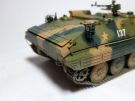
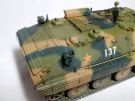
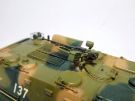
The YW-531B has two additional hatches on the roof as well as additional firing ports. The suspension was reinforced.
The hull is steel-welded and offers a limited protection against 12.7mm rounds. The vehicle has no protection against the NBC agents. It is amphibious and moves on water with its tracks.
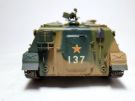
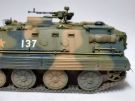
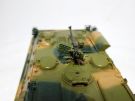
It is armed with a 12.7mm Type 54 MG which is a Chinese copy of the Russian DShK. On the first versions the gunner had no protection. On the YW-531B a shield was introduced during the production.
The crew includes a driver at the front left, a vehicle commander on his right, an assistant behind the driver and a gunner in the troop compartment. The section can be up to 10 soldiers.
In its numerous versions the Type 63 was widely exported and saw action in Vietnam, during the Sino-Vietnamese war, during the Iran-Iraq war and in more limited conflicts in Africa. The YW-531B only served in PLA.
The kit
Released by Bronco in 2011 it includes 8 beige plastic sprues, 2 hull halves, 2 clear parts sprues, 8 sprues for the left side track links, 8 for the right side track links, 1 photoetched parts plate, 1 sheet of generic markings and 1 instructions booklet. Many parts related to other versions of the Type 63 are not used.
The carving is fine and the level of detail excellent. However the hatches hinges are a bit thick in order to be functional. As there is no interior the hatches can be glued closed. Some parts are very thin and require extra care when cutting them from the sprues. The PE hooks are tiny and hard to glue around the engine deck. The fit very good except for the gunner shield which on one hand prevents the MG from moving and on the other hand blocks the rotation of the cupola between the rear hatches. The tracks are functional. However it is highly advised to glue them to avoid any breakage during handling.
The notice is quite clear however in some steps the numerous arrows can hinder a good understanding of the drawing. Some part numbering mistakes will be mentioned later on.
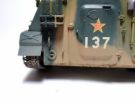
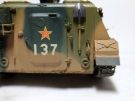
The decals sheet includes 6 series of numerals 0 to 9, 3 series of numerals 1,0 and 4 of a larger size and 3 series of different sizes stars. The decals are not glossy and are fragile.
The build
It begins with the running gear in the steps 1 to 3. The left side suspension arms locating holes are too narrow. The alignment of the arms must be checked before gluing the roadwheels. In theory the whole wheels can be moveable but the fragility of the tracks calls to glue them all to get a more robust assembly. Before gluing the wheels the lower hull is painted light olive. The wheels are painted according the chosen camo scheme. Then the tracks are assembled, painted and glued around the running gear.
At step 4 the upper hull is installed.
Steps 6 to 8 dela with the assembly of the side skirts. It is advised to enlarge the holes in sections B3 and B4 to install parts A21.
At step 9 Bronco inverted the location of the hatches Q8 and Q9. The hinges A58 are a bit thick in order to remain functional. They can be thinned if the hatches are glued.
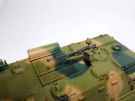
At step 10 you have to glue the numerous PE hooks P27. It is important to spot the right direction of each hook according to its location around the engine deck. Before adding the rods (to make yourself) between hinges P17 and P18, it is advised to glue the PE grilles P2 and P4 (which is only planned at step 14). The IR light and its protection cage are assembled but the glass J10 is not glued yet.
Step 11 deals with the Type 54 MG. This one is very fine and includes 18 parts in total. The mold lines is tedious. The gun muzzle is hollowed and the cross hair is thinned. The weapon being ill balanced it is glued slightly elevated. Part B17 representing some rounds is not used. Weirdly enough the ends of the absorbers springs H7 are not attached to anything.
At step 12 it is not necessary to glue the parts inside the rear door.
At step 13 you need to insert part B34 in a hole which is not molded in the hull rear plate. Roof hatches 6 and 7 are inverted by Bronco.
At step 14 the glass of the right headlight is not glued yet. As mentioned above it is advised to glue PE grilles P2 and P4 as soon as step 10.
At step 15 the formation light (A54) support should be P23 and not P22. The tow cables are made from twisted metal wire. The thread provided by Bronco is far from realistic. Then the cables are installed before gluing the latches A57. The glass of the left headlight is not glued yet.
At step 17 you need to assemble the gunner shield. There is an issue with the installation onto the cupola as there is no marking. Moreover if the MG is already glued the shield cannot be in contact with the cupola. If the MG is not glued the shield can be glued but it is lower than the rear hatches and prevent any rotation. So I decided not to use it.
The decoration
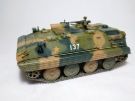
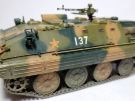
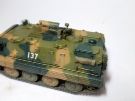
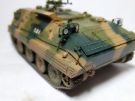
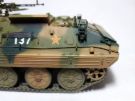
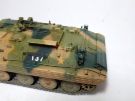
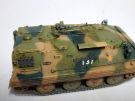
Bronco proposes two options for the camouflage. The first one sports a 3-tone camo (light olive, sand and dark green) used during an exercise with the Russian army in 2009. The second one is a plain olive used during the 1984 National Day parade in Beijing.
I chose the 3-tone one. Bronco gives Tamiya references for the light olive and the sand in their TS rattle can range. So I used references XF-59 for the sand and a very enlightened XF-58 for the light olive. For the dark green Bronco gives XF-61.
The camo is freehand airbrushed following the views provided by Bronco. However in some corners the colors edges do not match. Moreover you have to imagine the top camo as there is no view in the instructions.
Once the basic camo is applied the clear parts are installed and secured with some Klir.
The details are painted with different Tamiya shades. The metallic parts are painted XF-84 then rubbed with graphite powder. To get some shade variations the fuel can and the MG cradle are painted with a darker olive.
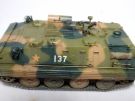
For the weathering a brown wash is applied around the details and in the recesses. Then a light ochre wash is applied all over the vehicle. Before it is dry the paint is brushed downward to create some streaking. Some oil dots are applied to add different effects. Then the dust is depicted by spraying a very diluted earth shade mainly on the lower parts.
Click on a thumbnail to see the full sized picture
|

|

|
|
|
|
|
|
|
|
|
|

|
|
|
|
|
|

|
|
|
||||
Last updated: 08/2022