Ref: Trumpeter #05537 PLA Type 62 light tank
The Type 62 tank is a light tank developed by China in the early 1960s. It is based on the Type 59 tank, but with a smaller caliber gun, lighter armor and reduced weight. The Type 62 tank was designed to operate in the mountainous and swampy terrain of southern China, where the Type 59 tank had difficulties. The Type 62 tank entered service with the Chinese People’s Liberation Army in 1963 and was produced until 1989. More than 1,500 units were built.
The Type 62 tank has a four-man crew and is armed with an 85 mm Type 62-85TC rifled main gun, which can fire armor-piercing, high-explosive and high-explosive anti-tank rounds. The tank also has two 7.62 mm machine guns, one coaxial, one bow-mounted and one anti-aircraft 0.50 cal MG. The tank is powered by a V-12 diesel engine that gives it a maximum speed of 60 km/h on road and 35 km/h off-road. The tank has a torsion bar suspension system and can travel up to 500 km on a single fuel tank.
The Type 62 tank saw combat during the Vietnam War and the Sino-Vietnamese War. It was also exported to several countries, such as Albania, Bangladesh, Cambodia, Congo, North Korea, Sudan and Tanzania. The Type 62 tank has been upgraded several times over the years, with improvements such as additional armor, fire control system, night vision equipment and new weapons. The most recent variant is the Type 62G, which has a new turret with a 105 mm gun.
The kit
Released in 2015 it includes 8 grey plastic sprues, 4 green plastic sprues for the individual non workable track links, 1 lower hull, 1 photoetched parts plate, 1 decals sheet, 1 brass braided length, 1 instructions booklet and 1 color plate for the decoration.
The cast is good and features few heavy mold lines. However some attachments to the sprues are a bit thick. The overall level of detail is good. Trumpeter give the fuel lines and the securing systems for the fuel tanks and the bins. However the interior of the laser rangefinder is hollow and the headlights glasses are molded in grey plastic. The fit is correct. The handrails around the turret are tricky to put in place because of the lack of positioning holes. There are two possible options for the driver hatch and the antenna base.
The 12 page notice split the build into 11 stages. Many numbering mistakes have been corrected with stickers. However all of them haven't been fixed. Sometimes the drawings show position holes which are not present on the parts.
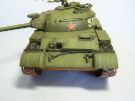
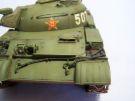
The color plate for the decoration presents a plain green tank and a three-tone camo one. The decals sheet includes 2 stars, 2 sets of 3-digit numbers slightly curved and 3 lines of individuals numerals.
The build
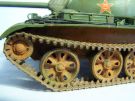
It begins with the running gear. The fit is good and you just need to check the suspension arms alignment. At step 3 the roadwheels and the sprockets are not glued yet. They just are secured with blu-tac to allow the coming installation of the tracks .
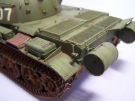
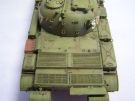
At step 4 you have to assemble the various tanks and bins on the fenders. Trumpeter give the straps as well as the fuel lines. You must shorten the front inner leg of bin C43. The part labeled A8 is in fact B8. The positioning holes for part C12 are missing. It is simpler to cut the pins on the part to place it. The assembling order of the fuel lines is as follows C51-C52-C8.
At step 5 Trumpeter ask to glue the tow cables hooks then add the cables which is not possible. The simplest is to glue the locks B3 first then insert the cables eyes in the hooks B6 and glue them to the glacis.
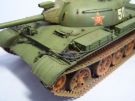
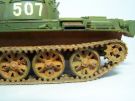
Step 6 deals with the assembly and the installation of the tracks. There are 92 links per track. Adding one or two additional links allows a better sagging. The tracks are built in 2 lengths wrapped around the running gear and secured in place with masking tape until the glue has set. They are then removed to be painted as well as the roadwheels.
At step 7 Trumpeter also made mistakes in the notice. Part C21 is indeed C71. Part B8 which is visible on the drawing is not labeled. It is advised not to glue the power cables C37 and C38 before gluing the lights A8 and A9. The headlights glasses A10 are too large to be inserted and need some sanding. Trumpeter ask to assemble the protection cage first and then to glue the headlight to the frame. It is easier to glue the headlights to the frame sections C19 and C21 and then to glue the 3 sections to the glacis. As I have lost one part A10 I needed to replace it with a disc of clear plastic shaped with the tip of a brush handle. At this stage you can choose between two driver hatches.
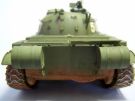
At step 8 you need to glue the upper hull to the lower one. Beforehand it is better to paint the running gear and the lower hull and weather them. The flaps C22 and C23 above the transmission features molded handles. As the flaps are displayed open, the handles must be vertical. So they are removed and glued back at the right angle.
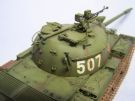
From step 9 the turret assembly begins. The muzzle of the coaxial MG C50 is hollowed. The interior of the rangefinder is detailed with a back in plastic card and two 1.5mm diameter discs to figure the lenses. The discs are glued to the back and drilled out. It is possible to feature the hatches open however there is no interior to show. Trumpeter give two options for the antenna base.
At step 10 you have to glue the various accessories. On the antiaircraft MG support C69 a hole must be drilled to glue the handle C48. Gluing the handrails A2 and A7 is tricky because Trumpeter did not make holes for a sturdy assembly.
At step 11 the turret is to be inserted onto the hull. Unlike the usual system including notches in the turret ring and tabs at the base of the turret, the system designed by Trumpeter includes clips which prevents the turret to be removed. So it is advised to wait for the end of the painting stage before mating the turret to the hull.
The decoration
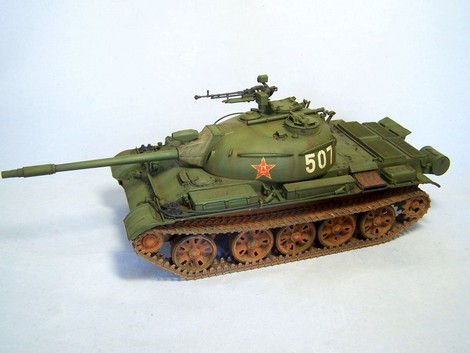
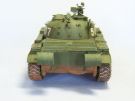
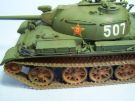
The tank is painted plain green. The
base paint is XF-67 NATO
Green. Then the shade is progressively enlightened with some XF-4 Yellow Green
and sprayed by insisting on the upper and horizontal surfaces.
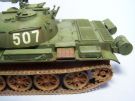
For the weathering a dark brown wash is applied with a brush. Then oil dots are
deposited. They are brushed downward on the vertical surfaces and merged on the
horizontal ones. Another brown wash is applied around the details. The streaking
effects are made with water pencils. The mud on the running gear is a mix of
plaster and MIG Vietnam Earth pigments.
Click on a thumbnail to see the full sized picture
|
|
|
|
|

|
|
|
|
|
|
|
|
|
|
|

|

|
|

|
|
|
|
||
05/2023