ref: FineMolds :#FM40 Japan Ground Self-Defense Force Type 60 APC
ref: FineMolds :#FM40 Japan Ground Self-Defense Force Type 60 APC
The Type 60 is the first APC built in Japan by Mitsubishi for the Ground Self-Defense Forces. Its development started in 1956 and the entry into service occurred in 1960.
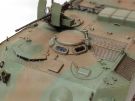
The Type 60 has a crew of 4 : a driver, a hull MG gunner, a cupola MG gunner and a commander. The vehicle can accommodate 6 infantrymen in the base version. The access is made by the two rear doors.
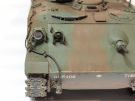
The armament consists of one 0.50 cal MG on the cupola and one hull 7.62 mm MG.
The vehicle is built in steel. It is not protected against NBC agents and not fitted with smoke-grenades dischargers. It is not amphibious but can ford rivers up to 1 m deep.
The Type 60 was built in 3 versions : SU 60 APC, SV 60 81 mm mortar carrier and SX60 107 mm mortar carrier. The 105 mm self-propelled gun remained at the prototype stage. Some APC were fitted fitted with 2 KAM-3D antitank missile launchers. Those were installed on both sides of the roof hatches.
428 Type 60 were built between 1960 and 1972. It has been officially replaced by the Type 73 in 1973 however the very last vehicles were phased out in 2006.
The kit
Released by Finemolds in 2012, it comprises 4 green plastic sprues, 1 clear parts sprue, 1 sheet of decals and 1 length of thread. An optional PE set is mentioned in the notice.
The cast is correct but there is some flash on several parts. Some parts like the headlights guards lack finesse. The clear parts are really clear.
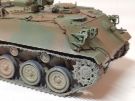
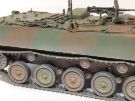
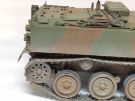
The hull is designed in 7 parts which generates some fit issue needed some putty to be solved. The tracks come in lengths and links. The detail is satisfactory however the rubber pads seem to thin. There is no interior even though the inner faces of some doors and hatches are detailed.
Finemolds only offers 2 options concerning the exhaust type and the installation or not of the rear view mirror.
The notice is a booklet. It is both in Japanese and English. However the historical background in in Japanese. The instructions for the 20 steps are clear. Some steps even feature an order to assemble the parts.
The decals sheet gives the choice between 6 decorations (3 plain green vehicles and 3 2-tone camo). One must notice the markings for the jerrycans.
The build
It begins with the installation of the hull MG into the front glacis. The muzzle is hollowed.
Steps 2 to 5 deal with the hull assembly. At step 5 you are insturcted to paint the interior white which is not necessary as there is no interior provided.
Steps 6 and 7 deal with the suspension and do not need any comment.
At step 8 you have to assemble the idlers, the sprockets and the roadwheels. It is better not to assemble the roadwheels to facilitate the future installation of the tracks.
At step 10 only the inner roadwheels are glued. The idlers and sprockets are not glued but just secured with blu-tac pending the assembly of the tracks.
At step 11, you need to choose the exhaust type. From this choice depends the final decoration. The exhaust outlets are solid and it is better to hollow them.
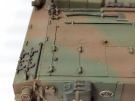
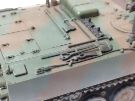
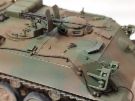
At step 13 you need to install the headlights and their guards. The latter are too thick and designed in 2 parts with a seam just above the headlight which is tricky to eliminate. The cable brackets C14 need to be more hollowed.
At step 14 you need to slightly shorten the positioning rods for the spare track links.
Steps 15 and 16 do not need any comment.
At step 17 it is important to follow the instructions to assemble the tracks. Once they are assembled and glued to the sprockets and the idlers they are painted separately. The lower hull is painted as well. Then the tracks are pt in place and the outer roadwheels and return rollers are glued.
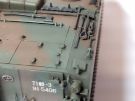
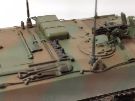
At step 18 you have to assemble the .50 cal MG which seems a bit thin. Its muzzle is hollowed. The ammo can holder A38 must be thinned.
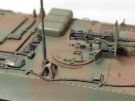
At steps 19 and 20 you glue the very last details. I did not used the rear view mirror and I only glued the antennas after the painting of the vehicle.
The decoration
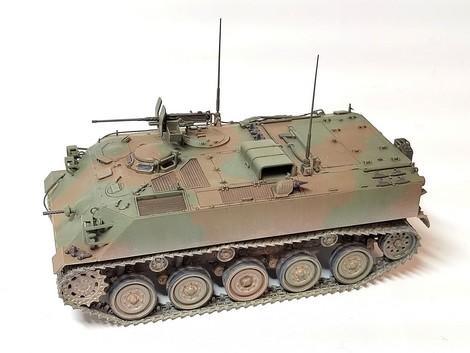
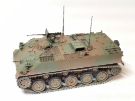
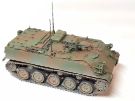
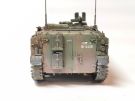
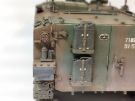
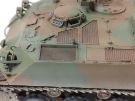
I chose option 6 depicting a vehicle belonging to 71st Tank Regiment in camp Kita-Chitose. The 2-tone camo is done with Tamiya XF-72 JGSDF Brown and XF-73 JGSDF Dark Green. Finemolds also gives paint references in 2 GSI ranges.
Most of the details are painted with XF-74 JGSDF Olive Drab.
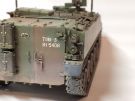
For the weathering the lower hull has been partly covered Airfield Dust pigments to create mud packs. The dust effect is done with Lifecolor liquid pigments Road Dust and Dark Dust.
The upper hull got a brown wash first. Then color variations were made with water color pencils. Finally to enhance the details a pinwash has been applied then a drybrush was done.
Conclusion
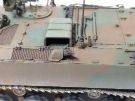
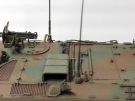
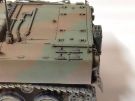
It is an easy to assemble kit thanks to a clear notice and a reasonable part count. The detail finesse is not up to the current standard. However Finemolds has issued an original model which perfectly complements the Tamiya Type 61 MBT.
Click on a thumbnail to see the full sized picture
|
|

|
|
|
|
|
|

|
|
|
|
|
|
|
|
|

|
|
|
|
|
|
|
|
|
|
|||
| WIP pictures |
Last updated: 03/2025