ref: Academy:#13511 R.O.K. Army K2 'Black Panther'
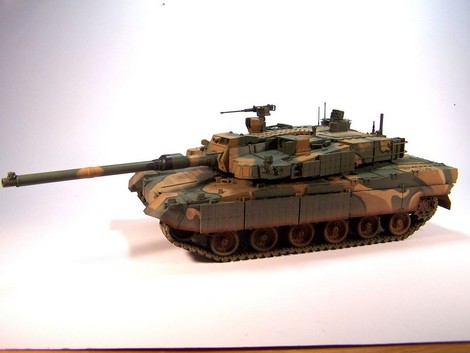
The K2 is the latest Korean MBT entered in service in 2014. It will replace the fleet of ageing M48.
The K2 has been designed by Hyundai Rotem from 1995. After a difficult development because of issues with the local engine and transmission, a first order was placed in 2011 for 100 MBT equipped with the German MTU MT-883 engine and Renk HSWL 295 TM transmission. In 2014 a second order for 106 MBT equipped with the original engine and transmission was placed. But only the Korean engine could be integrated. The final deliveries took place in 2020 instead of 2017. A third batch is anticipated.
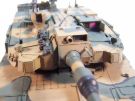
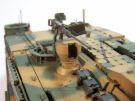
The K2 is armed with a L55 120mm smoothbore gun associated to an autoloader with 16 rounds (24 additional rounds are stowed in the hull). The commander has an independent thermal viewer. The secondary armament comprises a 7.62 mm coaxial MG and a 0.50 cal MG on the turret roof.
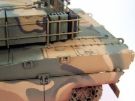
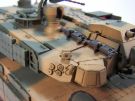
For its protection the K2 is fitted with 4 laser warning sensors and milimetric radars. Its armor can be reinforced with explosive reactive armor blocks. 12 grenade launchers capable of firing smoke and IR grenades are installed on both sides of the gun and a rotating launcher is on the turret roof.
The tank is also fitted with a battle management system and IFF system. The driver has a thermal camera. The suspension allows the individual adjustment of each suspension arm.
The crew is of 3: a commander, a gunner and a driver.
The K2 is in service with the ROK army only even if the tank has been proposed on the export market aiming at Middle-Eastern countries.
The kit
Released in 2017, it includes 6 sand plastic sprues, 1 upper hull, 1 turret lower part and upper part, 11 black plastic sprues for the track links, polycaps, 1 length of nylon thread, 1 small photoetched sheet, 1 sheet of "polaroid" stickers, 1 sheet of decals, 2 instructions manuals and 1 color plate for the painting.
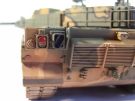
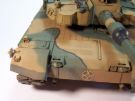
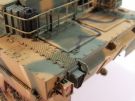
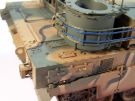
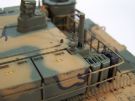
The carving is good and the detail is crisp. The hull and the turret are multiparts (bottom, sides and top). The rods of the bustle basket are really thin. However all the handles are molded solid. The fit is excellent and only the gun mantlet requires some putty. All the hatches can be opened. However Academy does not provide the interior with the exception of the gun breech. The ERA blocks are separate parts and can be set apart.
The glasses are cast in plastic and should be represented with the red "polaroid" stickers which rendition is not that great.
The tracks are workable unlike the suspension. Each link is made of the main body, the tooth guide and two connectors. The assembly is straightforward and the cleaning of the parts is limited.
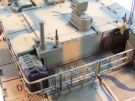
The two PE parts are in steel and stiff. As they are the bottom of the bustle basket this is not an issue. You just need to carefully put them in place to facilitate the assembly of the whole basket.
The decals are a bit thick. Academy provides many markings which are not included in the decoration options. In the end the only markings which are used are the stencils and the division badge.
The instructions come in two 8-page manuals and a large color plate for the two decoration options. The first manual deals with the turret and the assembly of the hull tub. The second one deals with the hull and presents a diagram of the sprues.
The build
It begins with turret and comprises 29 steps in total.
The turret
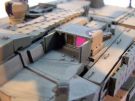
At step 1 you need to insert the episcopes C12 and B34 n their locations after having attached the "polaroid" stickers. The rendition being unsatisfactory the episcopes will be painted later on.
At step 2 take care to properly place the basket mesh grilles so the vertical posts can fit well at the following steps.
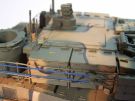
At step 3 Academy asks to glue the water and fuel cans to the basket. This is not necessary yet. They can be installed once they are painted.
At step 4 the fording schnorkel is very simplified. The handles are molded solid. They could be replaced by metal wire.
At step 7 the gun mantlet is made of 5 parts and some putty is need to fill the gaps even if they are tiny.
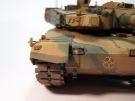
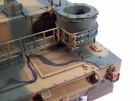
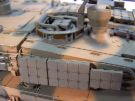
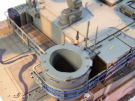
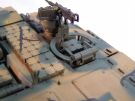
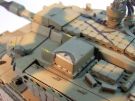
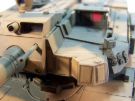
At step 8 it is possible not to install the ERA blocks. To do so you need to cut the positioning studs on part C10 (and C11 at step 9). The 0.50 cal MG support B21 is designed to be glued in the center of the ring mount. It would be more logical it sits on a side. For that you need to cut the positioning stud.
At step 9 the "polaroid" stickers for the main sight are not used.
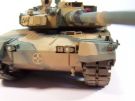
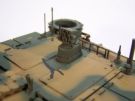
At step 10 the various aerials are not glued to avoid breaking them. At the front of the turret you have to install either the sensors EE7/8/9 or the sensors E10/11/12. They are not the identical so you have to use the same parts on the left and on the right which is not clear in the instructions. The gun is molded in two sections plus the separate muzzle. You just have to clean the thin mold line.
At step 11 the MG is assembled but not glued yet. The flags supports are molded solid with the flag handles. Those are cut away and the supports are hollowed.
The hull
At step 11 you have to install stiffeners.
Steps 12 to 15 do not need any comment.
At step 16 take care to identify the idlers from the roadwheels. In case of a mistake they can be removed since the roadwheels and the idlers include a polycap.
Step 17 is the first of the second manual.
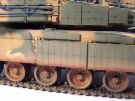
At step 18 you have to glue the sprocket mud scrapers C43. To keep the sprockets moveable avoid gluing the mud scrapers too far into the hull side.
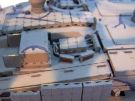
From step 22 the assembly of the hull upper part begins. Do not forget to drill the holes for the ERA blocks D8, D9 and E41.
At step 23 just like for the other episcopes the "polaroid" stickers are nut used on the driver's ones.
At step 24 the reflectors E43 can be thinned.
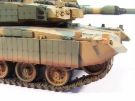
At step 25 you have to assemble the tracks. This does not require any glue but is time consuming because there are 75 links per track even if Academy tells to assemble 78. The tracks are painted without the rubber pads which will be painted first and then attached to the tracks.
Steps 26 to 28 do not need any comment.
At step 29 you have to install the rearview mirrors. It is better to paint them first.
The painting
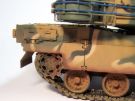
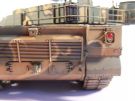
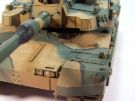
The Korean camouflage scheme looks like the old US MERDC one but the black and sand lines are very different. Academy gives a color scheme. Only one mistake has been spotted: the rear right mudflap should be green instead of brown.
The colors used are the following: XF-65 Field Grey, Prince August 26 Marron Tan US Vietnam, XF-85 Rubber Black and XF-78 Wooden Deck Tan. The green and brown areas are airbrushed while the lines are painted with a brush.
When the camouflage is dry a coat of Klir is sprayed before the application of the few markings. Academy do not provide any indication about the units. However many numerals and unit badges are on the decals sheet. I chose a tank belonging to the 20th Mechanized Infantry Division. At the front of the hull there is the division badge. On the turret top and bustle there are several stencils. No vehicle numbers are seen on the K2 MBTs.
The weathering started with a dark brown pinwash. The dust effect is done by spraying with an airbrush various shades of Earth and Brown.
Reference
South Korean K1 and K2 family, Gordon Arthur, Trackpad Publishing
Click on a thumbnail to see the full sized picture
|
|
|
|
|
|
|
|
|
|
|
|
|
|
|
|
|
|
|
|
|
|
|
|
|
|
|
|
|
|
|
|
|
|
|