Ref : Showcase Models Australia #35001 Bushmaster Protected Mobility Vehicle
Mouse Armour # MAD629 Australian Hex Pattern camouflage
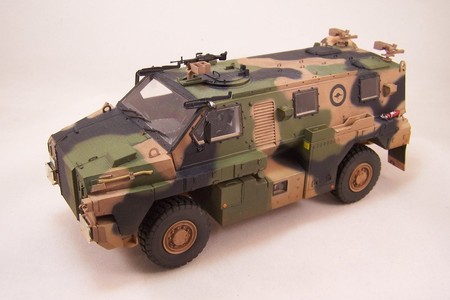
In the early 1990s, the Australian Defense developed the program Bushranger to produce a vehicle with a high level of protection against mines and capable of carrying up to 10 soldiers and providing them support for 3 days. The Bushmaster Infantry Mobility Vehicle was selected and 299 vehicles were initially ordered.
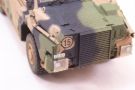
The Bushmaster v-shaped hull is designed to protect the vehicle against mines. The armored cabin protects the soldiers against small arms fire. The vehicle is fitted with a ring mount for a MAG 58 or a M249 Minimi MG. Two additional MG Platt mounts can be fitted at the rear of the troop compartment roof.
Seven variants of the Bushmaster have been purchased: troop, command, mortar, assault pioneer, direct fire weapon, ambulance and air defense. A new general maintenance variant is being created by modifying the assault pioneer variant and an electronic warfare variant is also being developed.
The Bushmaster was deployed in East Timor in 1999 to conduct trials. The true operational deployment was in Iraq in 2005. Later the Bushmaster saw action in Afghanistan too. Among the numerous users of the Bushmaster the Netherlands and Great Britain are those operating the largest numbers of vehicles.
The experience from Iraq and Afghanistan led to the modernization of the Bushmaster which includes a remote weapon station, spall liners, an additional seat and the capability to use mine rollers.
The kit
Manufactured by Showcase Models Australia, the kit comes in 9 grey plastic sprues, 1 clear sprue, 1 upper hull, 4 rubber tires, 1 photoetched part sheet, 1 decals sheet and 1 instructions booklet.
The detail level goes from rough to crisp. In this regard I consider the weapons as nearly useless. Some molding lines are a bit thick which makes the cleaning of some parts tedious. Several parts present some flash too. Strangely enough many of the photoetched parts are not better than the plastic parts they are supposed to replace. Of course they are crisper but they are wrong and do not improve the plastic parts. Other parts are too large and need some serious trimming to be positioned.
The instructions are quite good even though some parts are missing or some part numbers are wrong. While the instructions provide you with color references for the inside, they totally miss the numerous placard location inside the vehicle. Without a good walkaround, those decals are useless. The good thing is that SMA gives you a link for one walkaround.
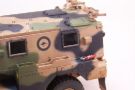
The decals sheet gives you 4 options for Australian vehicles (3 Army vehicles and 1 Air Force vehicle).
The build
The lower hull
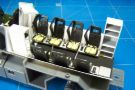
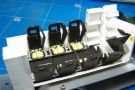
It takes 5 steps to make the drive train and the suspension. There is an issue with the ride height. Even if you follow the instructions the vehicle sits too low. One solution to fix this is to add a piece of plastic card between the hull and each suspension assembly. 1 mm to 1,5 mm should suffice. This will require to extend the shock absorbers springs B-18 as well. I chose not to modify my suspension.
At step 4, the trickiest operation was to fit part C-78 into its location. It took me nearly 30 mn to do so because of a poor design of the model. At the same step, you need to glue part C-37 on the left side. On the sprue you get the symmetrical part C-38 but the instructions miss it and I didn't figure out how to place it. So I let it apart.
At step 5, the only minor issue is the handle C-2 which is too short. It has been replaced by some brass wire.
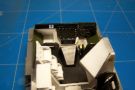
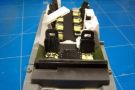
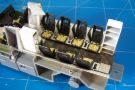
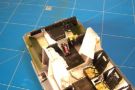
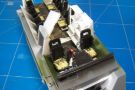
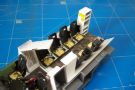
At step 6 begins the interior assembly. As I mentioned in the introduction the following PE parts as not better than the plastic parts: PE-14, PE-20, PE-31. Take note that it is better to glue the floor before the PE parts PE-13 and PE-24. The holes to position the floor must be enlarged for a perfect fit.
At step 7, you need to trim the large PE parts PE-16 and PE-28. The part numbers for the seats are inverted but this is not a big issue. I advise you paint and add the decal representing the fabric before you put the PE seatbelts. The seatbelts are too stiff so I annealed them to get them softer. The part F-2 needs to be shortened.
At step 8, you have to trim the PE parts once again. Use the upper hull to test the right height.
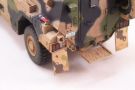
At step 10 you have to glue the parts C-55 and C-56. However you have no mark on the hull to place them appropriately. To do so the best is to dry fit the front bumper F-26 and align the parts with the bumper. Then you can assemble the both halves and definitely glue the bumper. I didn't glue the wheels at this stage.
The upper hull
The steps 12 and 13 require some patience because of the number of parts to use you will meet no trouble there. However I advise not to glue the side mirrors at this stage as they are very fragile. I added on the hood the front bracket for the ax. The instructions do not tell you to add part B-7 over the right side light C-7 but actual vehicle pictures show you need to do so.
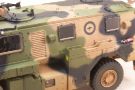
At step 15 I decided not to use the kit weapon which is rough. I only kept the stock and used a Tamiya M249 MG which is finer. The handle F-18 has a series of holes that I totally drilled. The ammo can holder has been drilled out as well and the sides have been thinned. Likewise at step 16 I modified the ammo can holders of the both Platt mounts. The MAG 58 MGs being very poor I didn't use them.
At step 17 do not omit the handle F-25 which is missing in the drawing.
At step 18 I advise you glue the PE part PE-08 under part C-75. It will be easier than at the end of the build. The positioning holes for parts B-2 must be enlarged. Again there is no mark to place the tools F-10 and F-12. Refer to the drawing of step 19 to know their position.
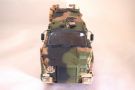
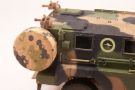
At step 19 you need to add the bit of tube where the towing bar eye is secured. I added the straps for the angled rod C-77. Do not attach the spare wheel until you have set the decals depicting its cover. As the ones provided in the kit were not the right colors, I used a Mouse House reference which is far better.
The decoration
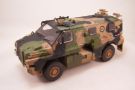
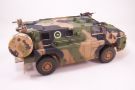
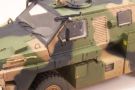
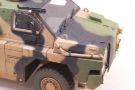
The Australian camo scheme uses two specific colors (Lustreless Olive Drab and Tan) and some black. SMA gives you color references in different ranges (Mouse House, Gunze, Tamiya and Model Master). I know Mouse House offering is the best but I only have Tamiya at hand. The references given by SMA are not a perfect match. So I made my own recipes. For the tan I sprayed some Wooden Tan then I applied some washes of Flat Earth to darken it. The green is a mix of Olive Green and Yellow Green.
The camo scheme in the instructions is correct.
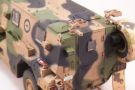
As I chose the RAAF decoration I decided for a light weathering. I started by the application of some oil dots to break the monotony of the colors. Then I applied a pinwash to enhance the details. I finally dusted the lower part of the vehicle by spraying some Red Brown and Flat Earth.
Conclusion
This kit opened the way to the many MRAP kits which are currently available. It is definitely not an easy build so beginners should better stay away of it. However it is quite original. It is a pity that Arms Corps Model stopped its range of AM stuff and especially the correct suspension set which could have facilitated the build and improve the kit in some areas.
Click on a thumbnail to see the full sized picture
|
|
|
|
|
|
|
|
|
|
|
|
|
|
|
|
|
|

|
|
|
|
|
|
|

|
|
|
|
|
|
|
|
|
|
|
|
|
||
10/2018