Ref: Trumpeter # 09516 South African Rooikat AFV
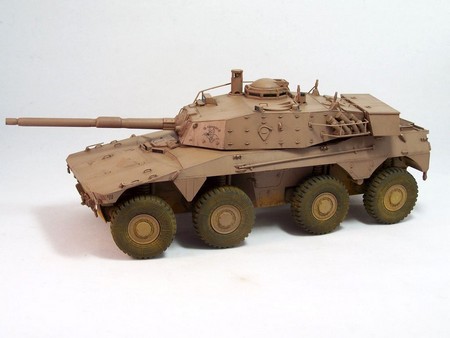
The Rooikat is a South-African designed combat and reconnaissance vehicle which has been developed since 1974 to replace the Eland 90, the South-African version of the AML 90. The three first prototypes were trialed until 1979 however none was considered as suitable. Among the three next prototypes, prototype Class 2B was selected for further tests until 1989 before it entered service with 1st Special Service Battalion. The production of 242 vehicles (three batches) lasted from 1990 to 2000. From 2000 to 2006 80 Rooikat Mk1 C were upgraded to Mk1 D standard and are still in service with the South-Africa National Defence Force.
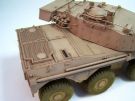
The design emphasizes mobility first and then firepower. The missions the Rooikat was designed for were: reconnaissance, search and destroy, combat support, anti armor and anti guerilla warfare. The vehicle organization is a classic one: the driver compartment at the front in the center, the turret with the vehicle commander, the gunner and the loader is in the middle and the engine compartment is at the rear.
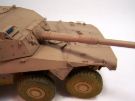
The turret is armed with a 76 mm GT4 quick fire gun. The APDSFS round can frontally penetrate a T-62 at 2000 m. The explosive round has a range of 3000 m. In the Mk1 D 49 rounds are on board with 9 ready to fire in the turret. The secondary armament includes 1x 7.62 mm coaxial MG and in the early Mk 1x7.62 mm on the turret roof.
The vehicle is protected at its front against armor piercing 23 mm rounds. It can survive a 454 kg explosive blast and keep on rolling with a destroyed wheel. It is also protected against NBC agents.
The Rooikat is in service in South-Africa only. It was never engaged in operation however in 1998 it was deployed to Lesotho to help the local army restore order and security. Several variants have been designed of which none entered production. Only the variant with a 105 mm gun could entered service in the future.
The kit
Trumpeter released a Mk1 C or D version recognizable by the lack of the turret roof MG. The box includes 9 light grey plastic sprues, 2 hull halves, 1 clear parts sprue, 8 vinyl tires, 1 photoetched parts plate, 1 decals sheet and 1 instructions booklet.
The cast is good however spure C presents many flash. The level of detail is good. The low point is the solid molded tie-downs on the turret sides. The photoetched parts are few but useful. Concerning the clear parts, it is advised to dry test them and sand them to ensure a perfect fit. The fit is not perfect especially concerning the suspension and the hull halves.
The instructions booklet presents only one part number mistake at step 5. It includes 12 pages and 17 building steps. A color sheet presents the three decoration options (2 plain brown vehicles, 1 three-tone one). The decals are few and quite thin. However they are glossy.
The build
It begins with the preparation of the lower hull. It is advised not to glue the headlights housing to avoid gaps when assembling the hull halves. The shackles brackets B7 can be hollowed.
Steps 2 to 6 dela with the suspension. As usual the large springs require a lot of work to remove the mold line. The assembly of the various parts is easy except for parts B13. The positioning tab is too large for the slot in parts A1, A2, A3 and A4. Moreover if B13 is glued at this stage, the shock absorber heads will not be in contact with the hull. It is better to remove the tab as well as the rod to insert into the shock absorber A8 and A11. Once the 8 swing arms and the 8 shock absorbers are glued it is possible to put parts B13 in place.
Note that at step 5 there is a part number mistake. Instead of A23 it is A22.
At step 7 the wheels are prepared but not glued yet.
At step 8 you need to thin either the right end of the crow bar C34 or its bracket on the rear plate. To avoid damage to the details the rear plate is glued to the hull first. The clear parts are too large, you need to reduce their diameter.
At step 9 the front plate is glued to the lower hull too before adding the details.
At step 10 as soon as episcopes GP6 are glued the hull top is glued. Then the headlights housings can be glued.
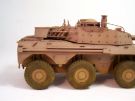
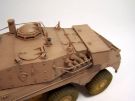
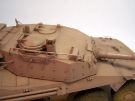
At step 11 the rear view mirrors are not installed. The bolted base is glued to the hull and the poles are replaced by brass wire. They are depicted in the lowered position. All the shackle brackets B7 are hollowed. On the left side front bin Trumpeter have represented two holes which do not exist and must be filled.
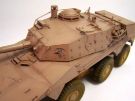
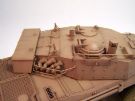
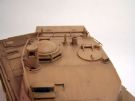
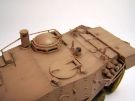
From step 13 the turret assembly begins. To enhance the tie-downs realism I carved them all. They are so many that I preferred this option to their replacement by brass wire. This way I was certain their positions would be correct. The gun mantlet is glued at the desired elevation and the gaps are filled with putty.
At step 14 you need to glue the gun halves. Unfortunately the alignment is poor. It is probably better to delete the positioning pins and align the parts. When the gun is assembled the seam needs to be cleaned. The front end of the front thermal sleeve element is beveled where it should be straight. On the hatch C17 you need to thin the hinge sides so it can be inserted into part C5. Clear part GP7 must be sanded to go into its housing.
At step 15 again you need to sand the hinge sides of hatch C23.
At step 16 the only issue is to remove the flash of the protection C19.
The decoration
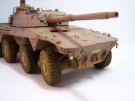
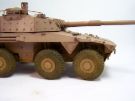
Trumpeter propose two paint schemes: one plain brown and a three-tone one. No unit indication is given. Paint references are given for 5 brands however they are only comprehensive for Mr Hobby brand.
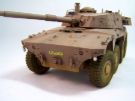
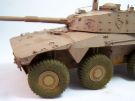
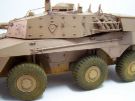
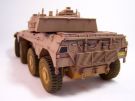
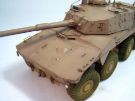
I opted for the plain brown version which corresponds to the beginning of the operational life of the Rooikat. The base color is XF-52 Flat Earth. The it is enlightened with some XF-78 Wooden Deck Tan. A coat of Klir is sprayed to facilitate the few markings application. They are sealed with another coat of Klir.
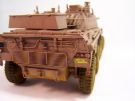
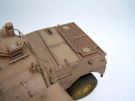
Then the weathering begins with a dark brown wash applied all over the vehicle. Streaking is done with the same shade. As can be seen on numerous pictures only the lower hull and the wheels are covered with dust. To depict it I used Sienna pigments applied with a brush and rubbed with a finger to remove the excess. The vinyl tires were first rubbed with steel wool and then dusted with pigments.
Conclusion
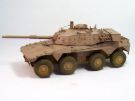
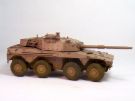
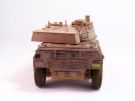
This kit is easy to build because of the limited number of parts. However the suspension requires some attention. Except for the headlights housing the fit is good. In the end the kit builds into an original vehicle with an aggressive look.
Click on a thumbnail to see the full sized picture
|

|
|
|
|
|
|

|
|
|
|
|

|
|
|
|
|
|
|
|
|
|

|
|
|