Ref: Takom #2052 SANDF Self Propelled Howitzer G6 Rhino
The G6-45 Rhino is self-propelled howitzer develpoed by Denel of South Africa from 1979. The embargo decided by the United Nations at the end of the 1970s because of the political situation in South Africa led the Army to locally develop the assets it needed in the context of the wars in Southern Africa. So the development of the G6-45 by Denel started. The gun retained was the 155 mm G6 L/45 which had to be adapted to a chassis and a turret.
The choice of a wheeled vehicle was made regarding the need of a strategic mobility and the simplicity of the logistical support. As soon as 1981 the first prototype was built and in 1987 4 vehicles were issued to the Army which immediately engaged them in the border war with Angola.
145 Rhino were built of which 43 for South Africa. The production ran from 1988 to 1994.
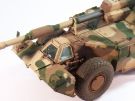
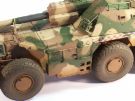
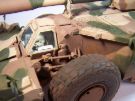
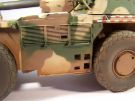
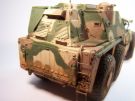
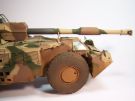
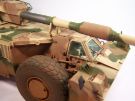
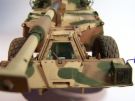
The Rhino is built with the driver compartment at the front, the engin in the center and the turret with the gun at the rear. It has 6 large wheels with run flat tires and torsion bars to increase mobility in rough terrain. Despite its weight of 45 tons it can reach 85 Kph on road and between 30 and 60 Kph off road. It has a range of 700 km on road.
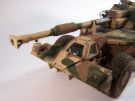
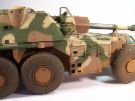
The turret is fitted with the 155 mm G6 L/45 howitzer capable of firing local made ammunition and all the NATO ammunition. The gun can elevate from -5 to +75° and has a traverse of maximum 40 degrees either left or right horizontally from the centre. Its rate of fire is 3 rounds per minute and its range is 30 to 52.5 km depending on the round. The gun also has a antitank capacity.
The G6-45 carries 39 rounds with 19 ready to fire in the turret. Additionally the Rhino can mount a 7.62 mm or a 12.7 mm MG on a pintle mount fitted to the left turret hatch.
The vehicle is protected against antitank mines. The frontal armor can sustain 23 mm AP rounds at 1000 m. It is pressurized against chemical and biological agents.
The crew is of 5: the driver at the front, the commander and three gun servants in the turret.
The G6-45 was
deployed in combat in Angola during operation Modular in 1987. On this occasion
in liaison with special forces on the ground a battery of 4 howitzers shelled
the airport of Cuerto Canavale destroying 4 Angolan MiG 21 taxiing to the runway.
In 2015 UAE deployed some G6-45 in Yemen.
The G6 Rhino has been exported to the United Arab Emirates (78) and Oman (24) in a different version. In 2003 the G6-52 armed with a 52 caliber gun was unveiled
The kit
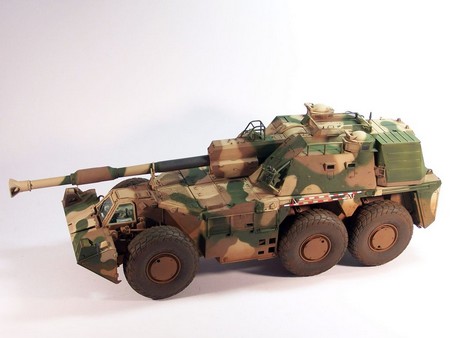
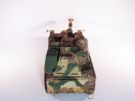
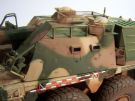
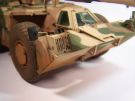
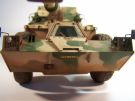
Released by Takom, it depicts a late version of the gun as in service with the South Africa National Defense Forces. Without some modifications it cannot depict the export version.
The box includes 5 light grey plastic sprues, 1 clear parts sprue, 4 separate parts for the hull, 1 upper turret shell, 6 vinyl tires, 1 photoetched parts sheet, 1 decal sheet for a single decoration and 1 instructions booklet.
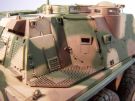
The cast is excellent and the level of detail very high. The gun barrel is in two halves joining vertically. The platform to access the rear of the turret is molded with a solid bottom while it should be a grille. Takom provides a corrected photoetched part TP5. The notice does not tell you to use it but it is engraved on the fret. Many parts are mobile of which the steering. However to keep it mobile you must not use the steering jacks which can be noticed. The cockpit interior is provided with painting instructions. Without reference pictures for it, you need to trust Takom.
The build
It begins with the left side of the hull and the stabilizer and the anchor spade. Then you have to assemble the driver station and an element of the steering designed to be moveable (parts C1, C2 and C5). I advise you build those parts as a sub-assembly and to install them only when you glue the driver station to the hull left side. Steps 3 to 5 complete the driver station. I decided to build the full driver station prior to gluing it to the hull.
Then you have to build the hull right side with the stabilizer and the anchor spade and glue the whole side to the left one.
At step 9 you glue the hull belly to the hull sides and a stiffening part.
At steps 10 and 11 I assembled the side windows without gluing them. Before adding the details I glued the rear plate then the upper plate to the hull. Take car to align all the parts to avoid any gaps or the use of CA glue as I had to do.
At step 14 you build the windshield protection which is raised when firing. The part is mobile but I advise to glue it (if you show the gun in the travel mode).
At step 15 (and 23) you must use a heated screw driver head to melt the ends of part D14. This is only needed if you intend to keep the steering mobile. Otherwise a drop of glue is enough. Likewise part C3 (C4) must not be glued to keep the steering mobile.
At step 19 I advise not to glue the lower part B2 of the ladder to keep it from breaking.
At step 21 you have to glue two tiny parts D10 against the headlights PE protections. If you intend to let the protections aside to paint the headlights more easily, take care to those parts. I did not glue the aiming stakes to paint them more easily.
At step 26 you must glue parts C34, C35 and C51 without any markings on the hull. Takom only gives a sketch with the parts in place.
At step 27 you assemble and glue the wheels. You can build the rims only and glue them on the swing arms and add the tires later. The wheels can turn.
The turret
Steps 28 to 31 do not need any observations.
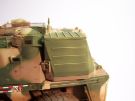
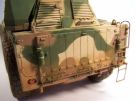
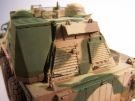
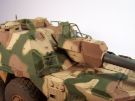
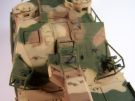
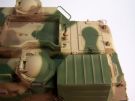
At step 32 you need to build the meshed bin on top of the turret. The plastic structure is fragile. The straight PE mesh panels TP4 and TP6 are easy to glue. It is advised to follow by gluing the panel TP5 which need to be bent taking care of adapting it to the structure shape. Finally the last panel TP3 can be glued.
The rest of the build of the turret and the gun is simple. The gun remains mobile and thus can be shown either in the firing mode or in the travel one. Unfortunately the gun travel lock is not workable. So you have to choose how to depict the gun.
Except the aiming stakes which will be painted separately, the build is over.
The decoration
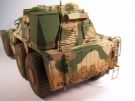
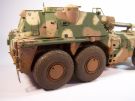
Takom proposes an overall tan decoration and a three-tone cam one with some markings. I opted for the second. One must be aware that the top view does not match with the side ones. Moreover the large bin at the left rear corner of the turret is most of the time a single color.
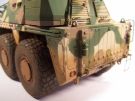
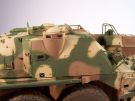
For the three shades of tan, brown and green I used the Tamiya references XF-78 Wooden Deck Tan, XF-52 Flat Earth and XF-58 Olive Green. To make the camo I sprayed the XF-78 all over the vehicle. Then I drew with a brush the edges of the other color areas. I filled the areas with an airbrush working as close as possible to the edges keeping the nozzle toward the center of the areas. Doing so it is possible to get a hard edge camo without masking.
For the aiming stake you need to paint 8 red stripes and 7 white. The both ends are red. So I painted the parts white. Then I cut some 3.53mm large stripes in masking tape to mask the white stripes. After the red color was applied the aiming stakes got a coat of satin varnish.,
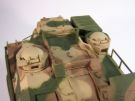
The weathering began with a brown filter all over the vehicle. The I applied a darker brown pinwash in the recesses and around the details. Before the filter was totally dry I made the streaking effect with a brush slightly soaked with white spirit. To simulate the read dust on the lower hull I started by applying with a brush a mix of Vietnam Earth pigments and Tamiya acrylic thinner. When the mix is dry I brushed away the excess and I repeated the operation on the areas which were too clean. I finished by spraying the same mix higher on the hull sides.
Conclusion
This huge vehicle builds quite easily and gives several display options. The decoration options are few but this is close to the reality. Those who would like to build an early production version or an export version will have to do some modifications particularly to the turret.
Click on a thumbnail to see the full sized picture
|
|
|
|
|
|

|
|

|
|
|
|
|
|
|
|
|
|
|
|
|
|
|
|
|
|
|
|
|
|
|
||||
11/2020